Just like Visual Studio, SSMS has solutions and projects. Solutions and projects organize the files that are important to your database application.
The biggest difference between working directly with database objects and working with SSMS solutions is that solutions are based on files in your filesystem, not on objects in your database.
Projects provide a way to organize the files in a solution into groups, and are basically subfolders on your filesystem. The solution is at the top of the hierarchy. All projects must be part of a solution, and every file must be part of a project. Solutions can have, and often do have, more than one project. You may create as many projects as needed.
-
Select New → Project... from the File Menu
New Project (and also Solution) 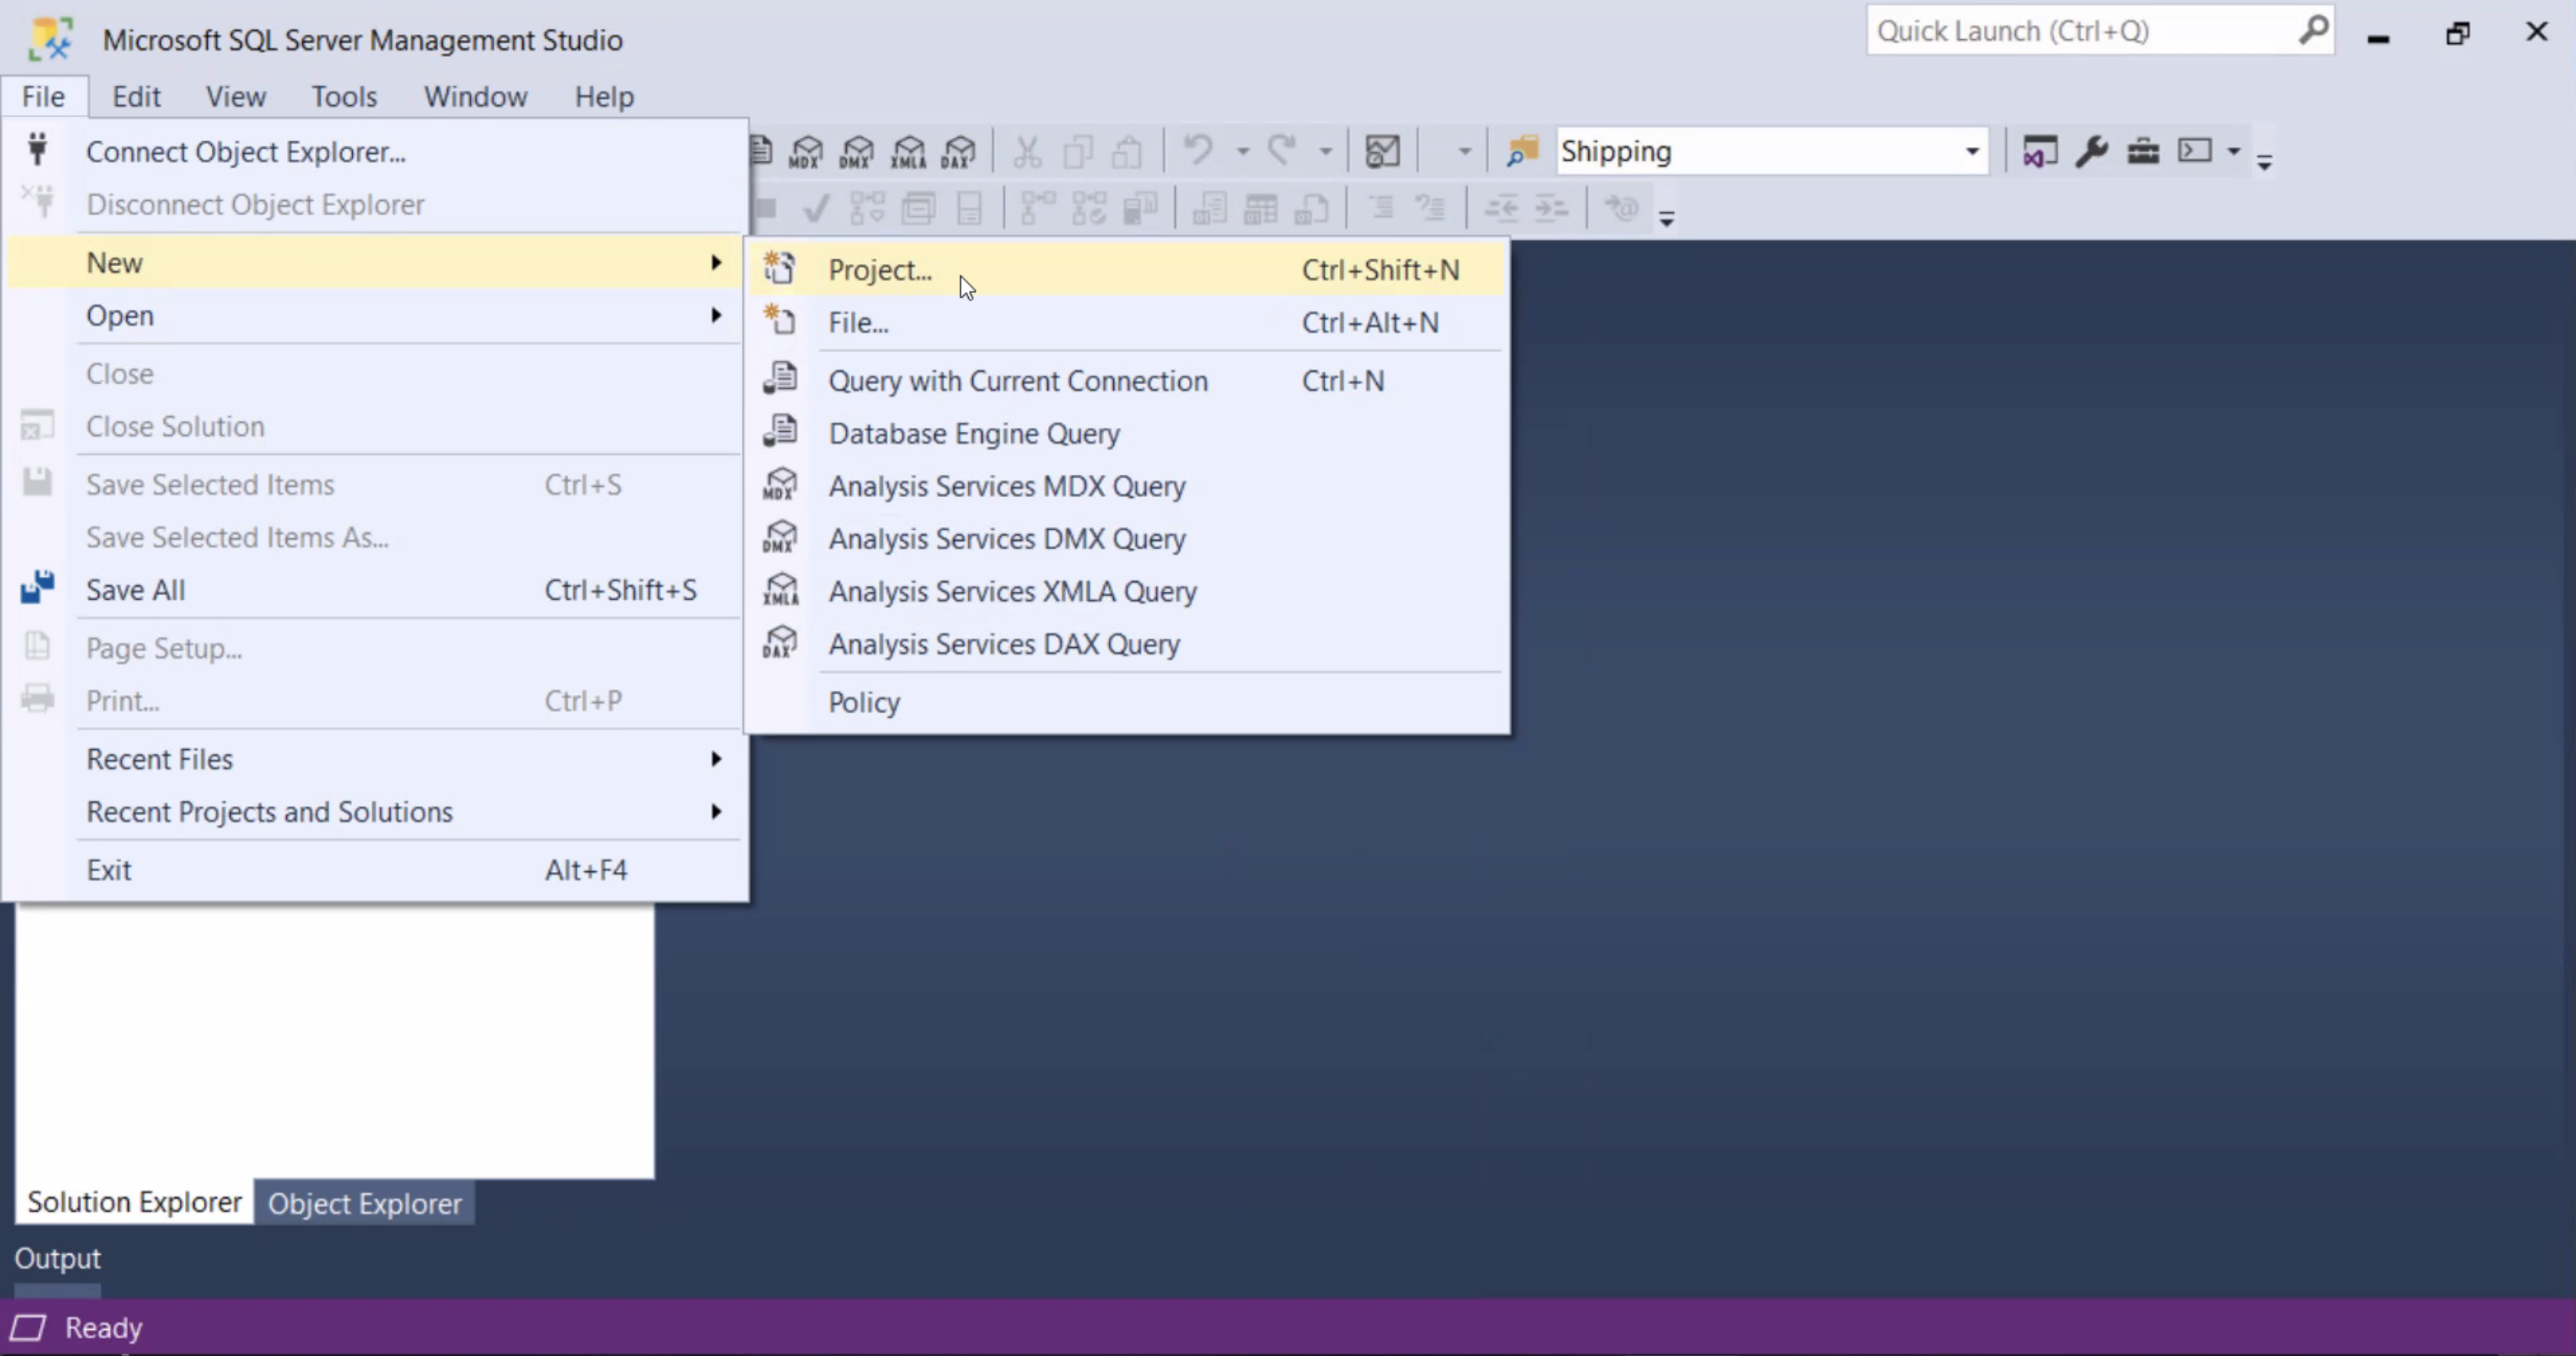
-
Follow these steps in the correct order
- Tick the checkbox, "Create directory for solution"
- Enter the "Solution name:"
- Enter the "Project name:"
- Click "OK"
Names and Locations 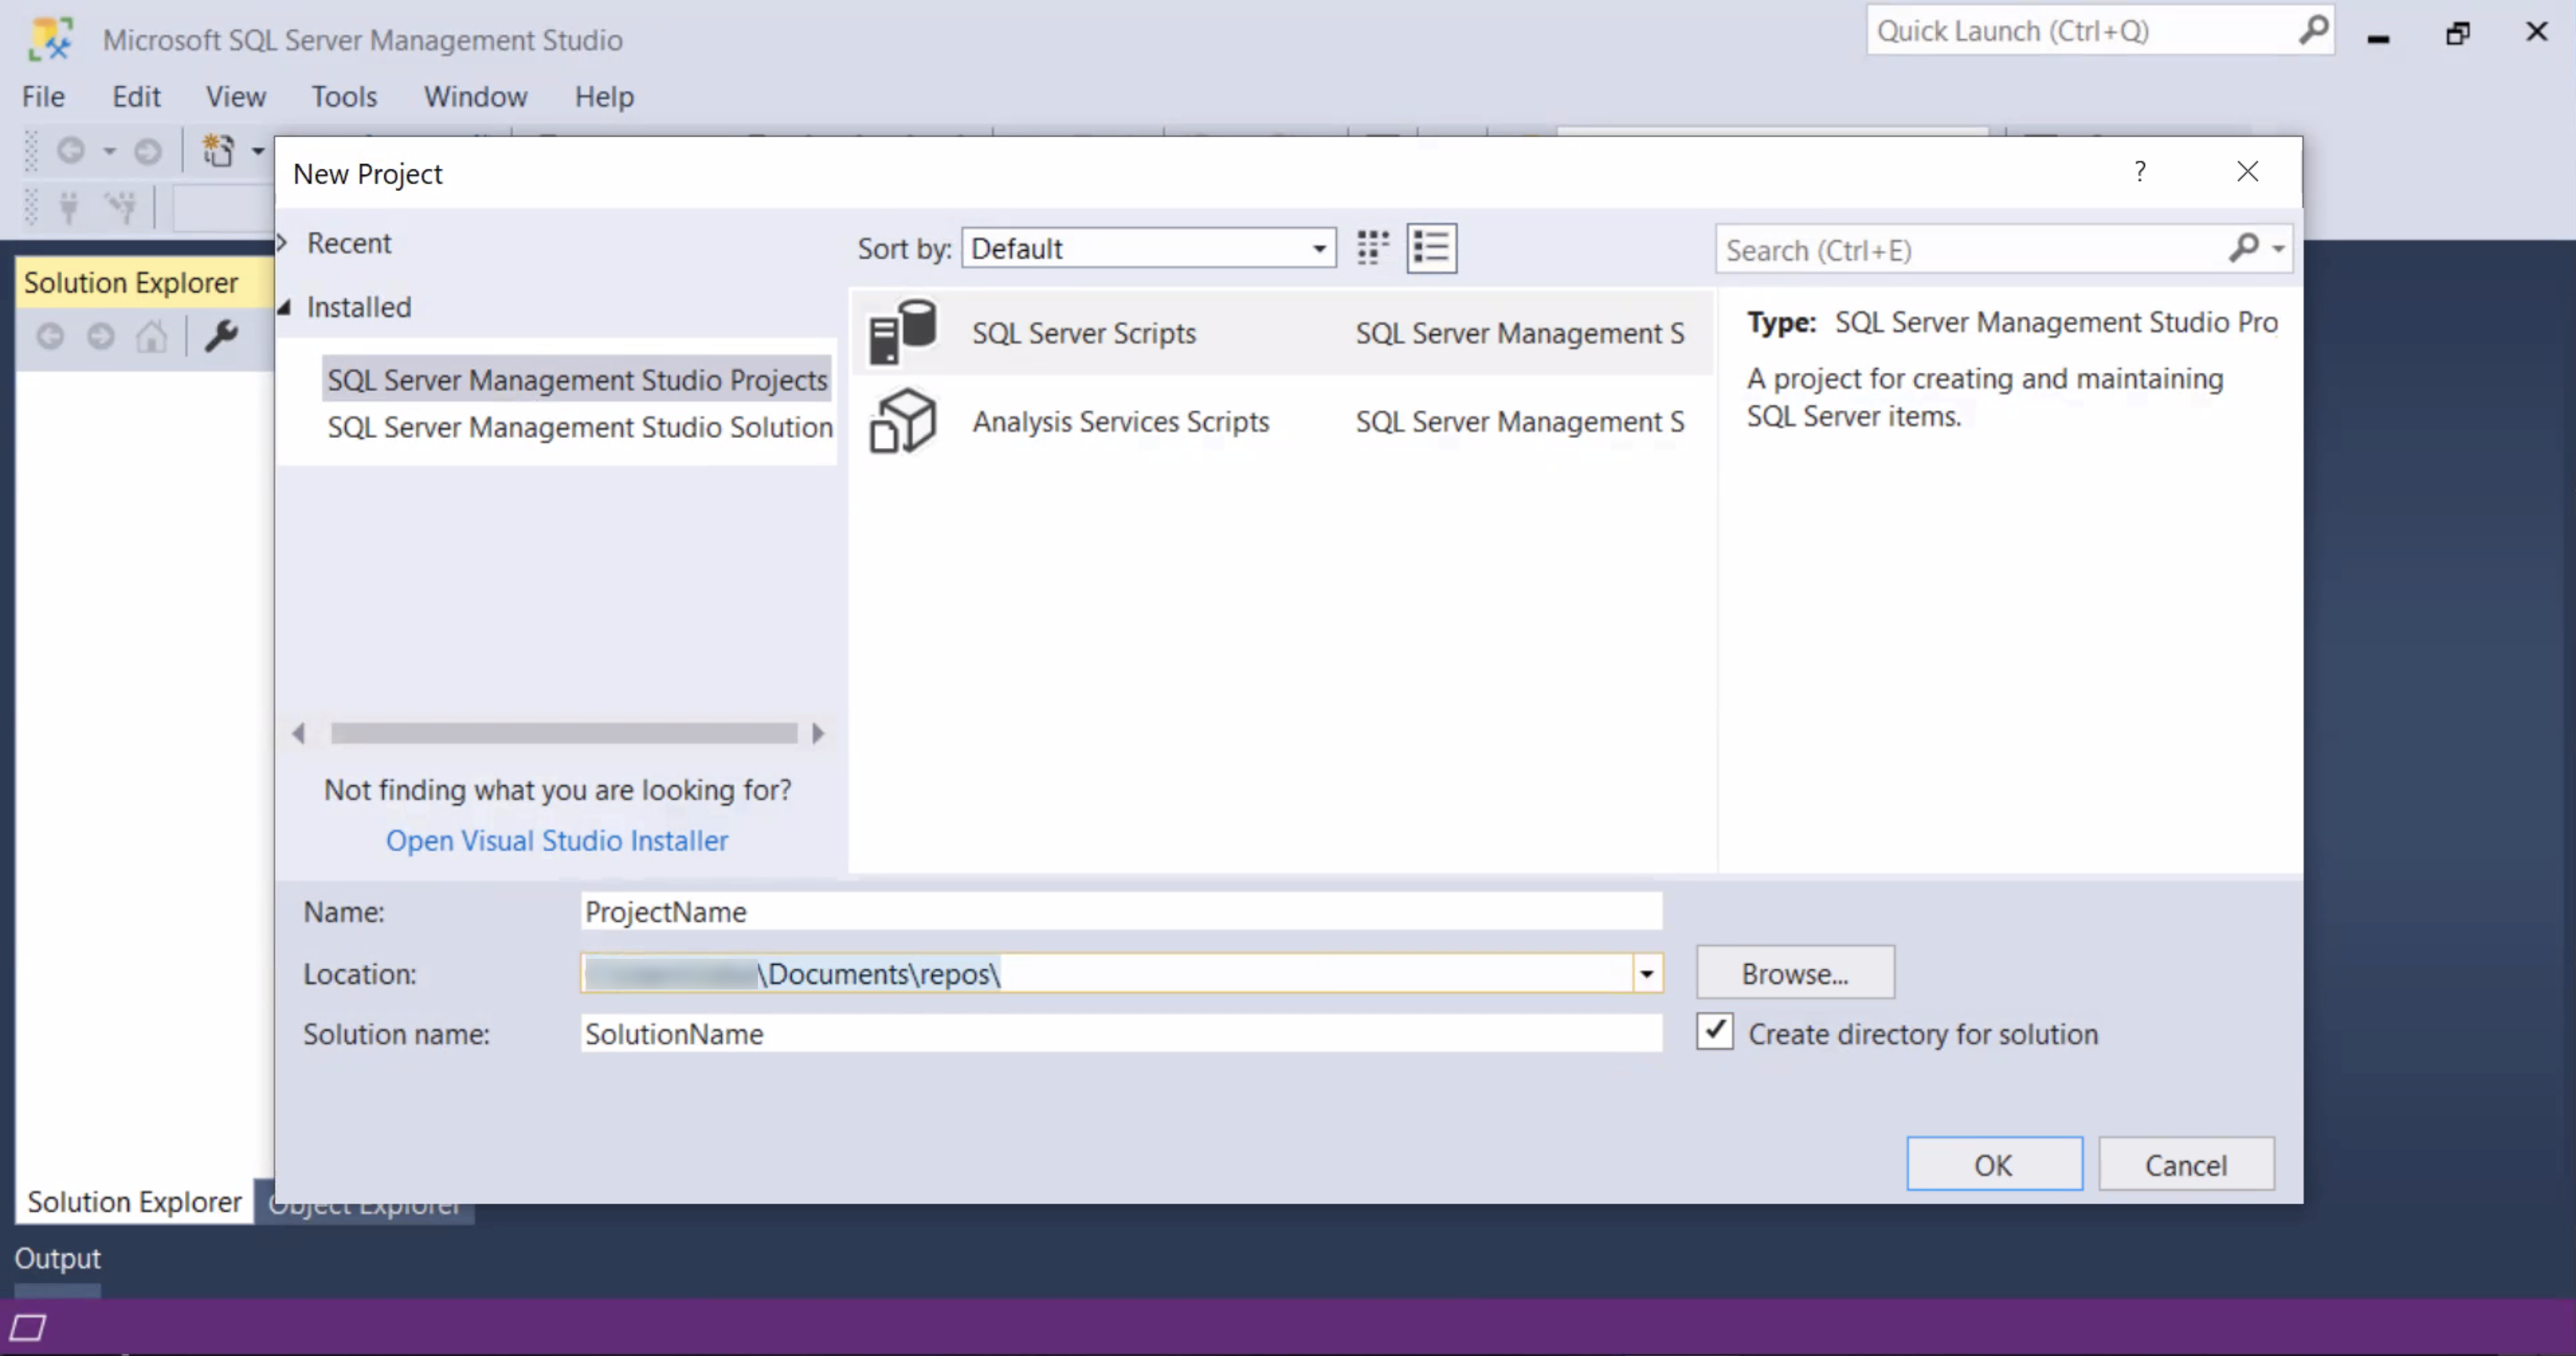
-
Note: If you don't see the Solution Explorer, open it by selecting Solution Explorer from the View Menu
Solution and Project Created 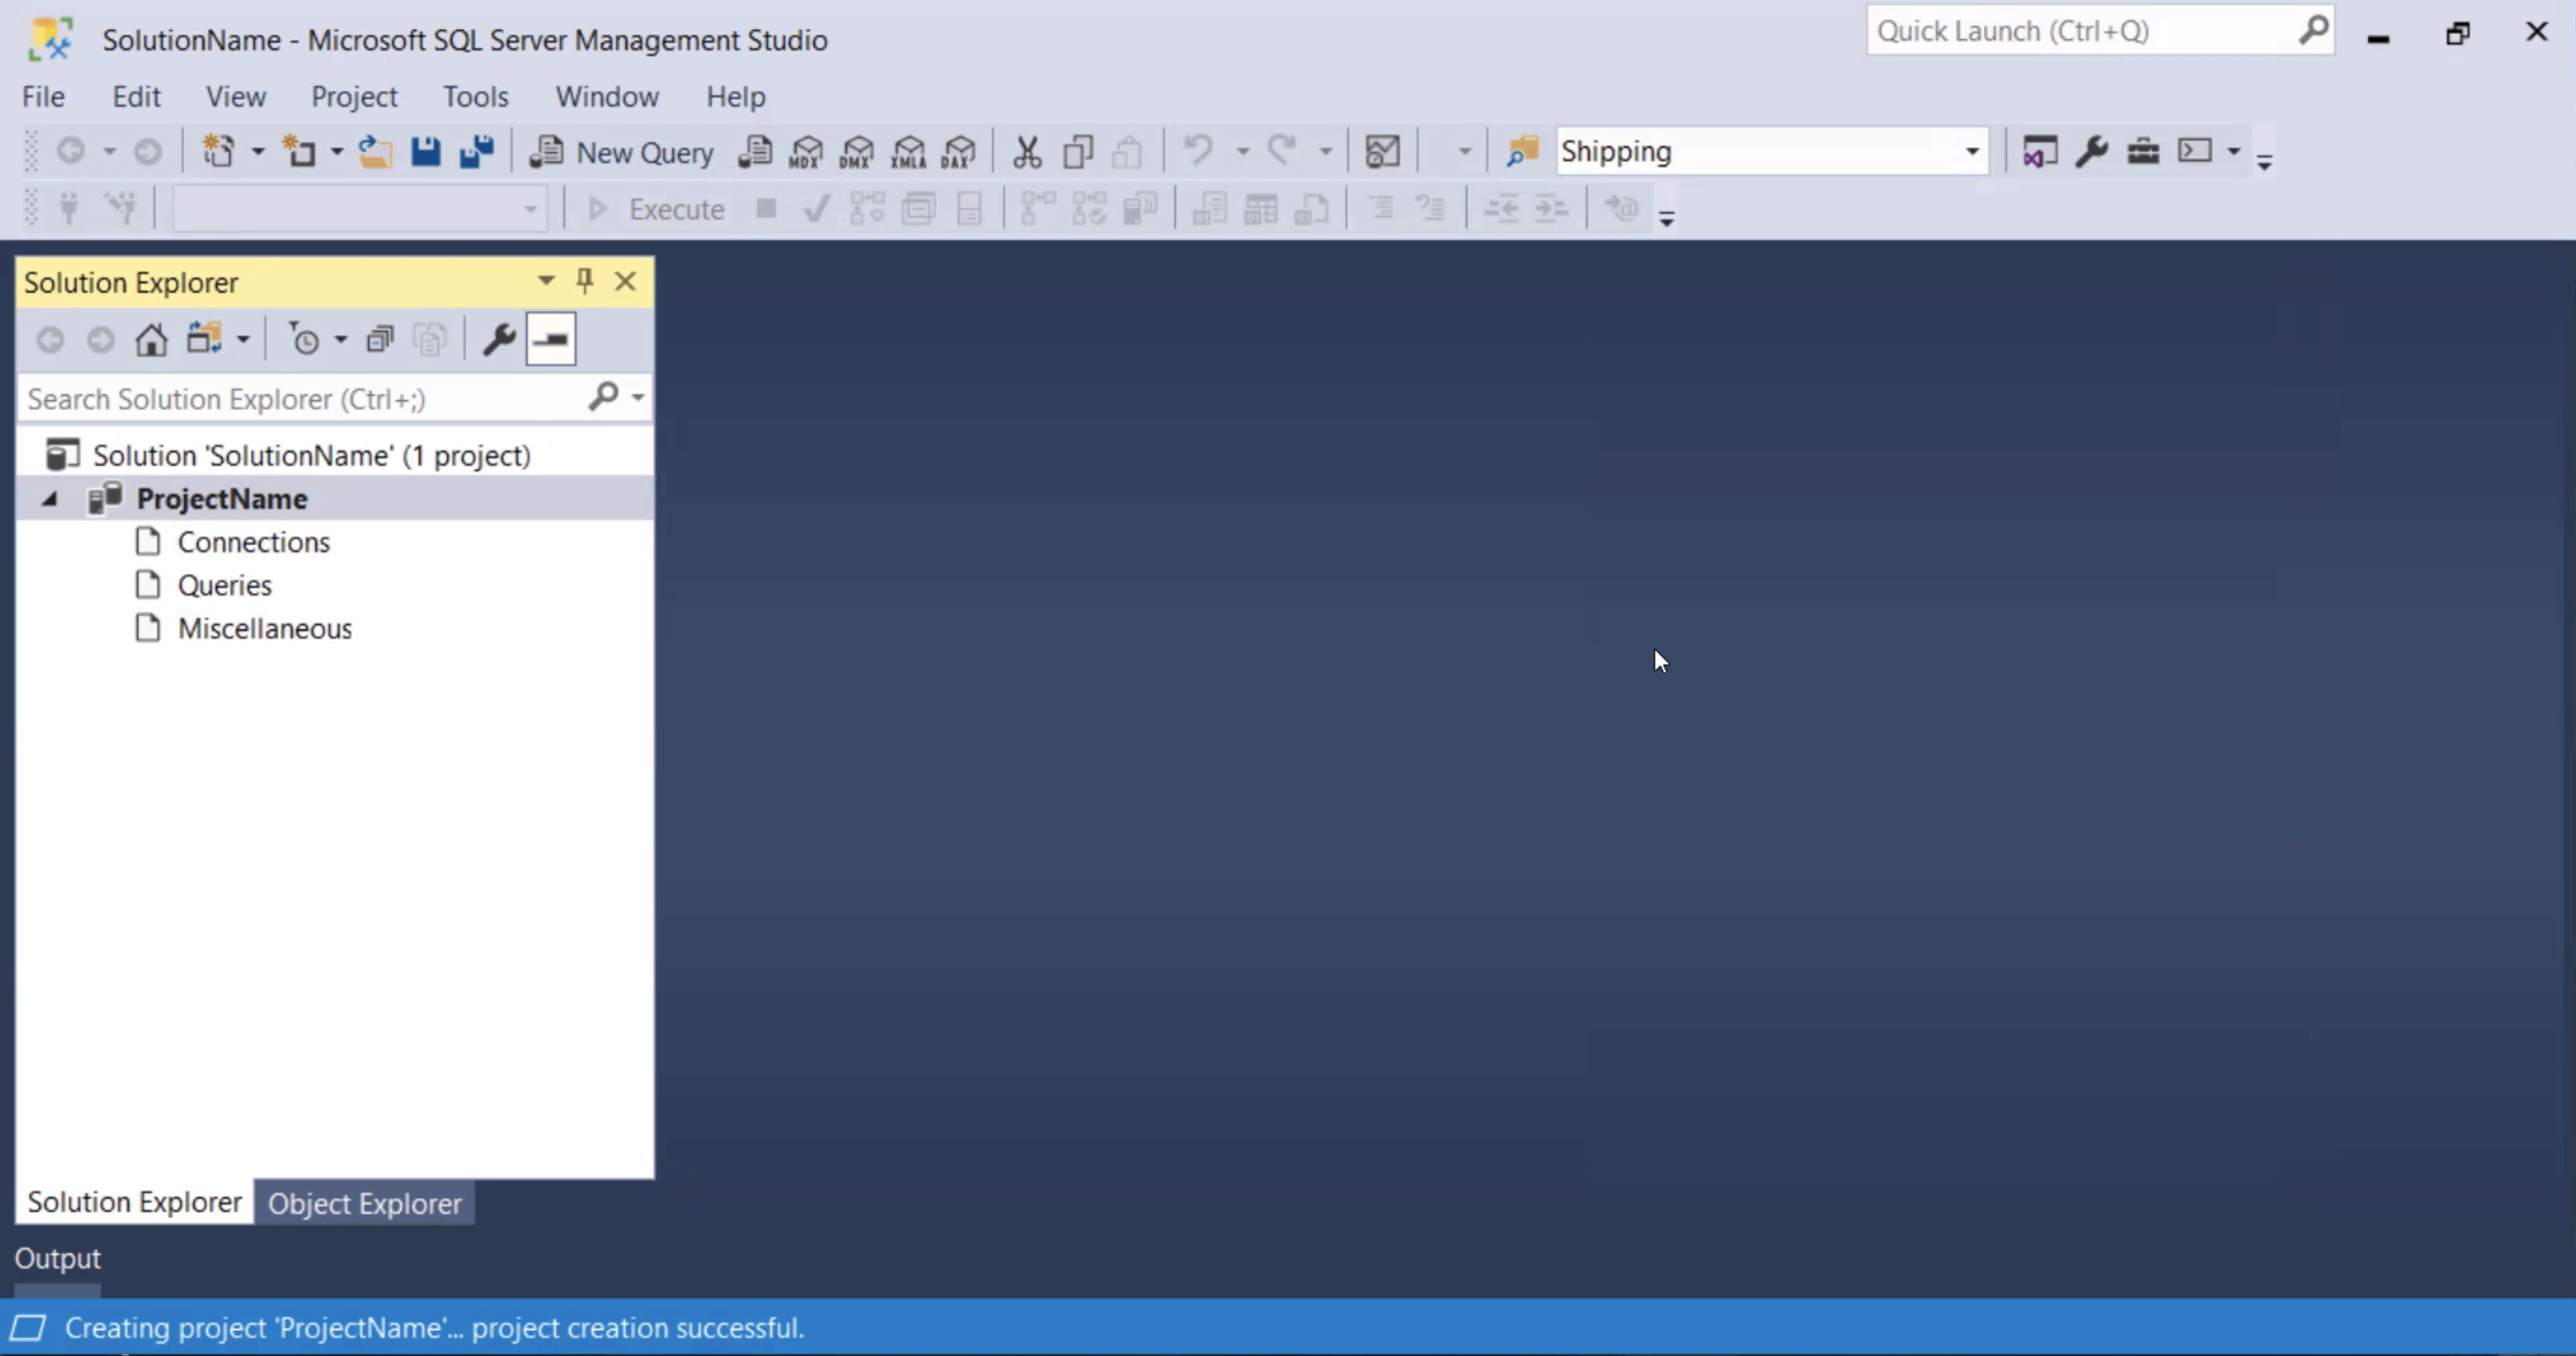
-
Right-click on the project name in the Solution Explorer and select Add → New Item... from the context menu
Add - New Item 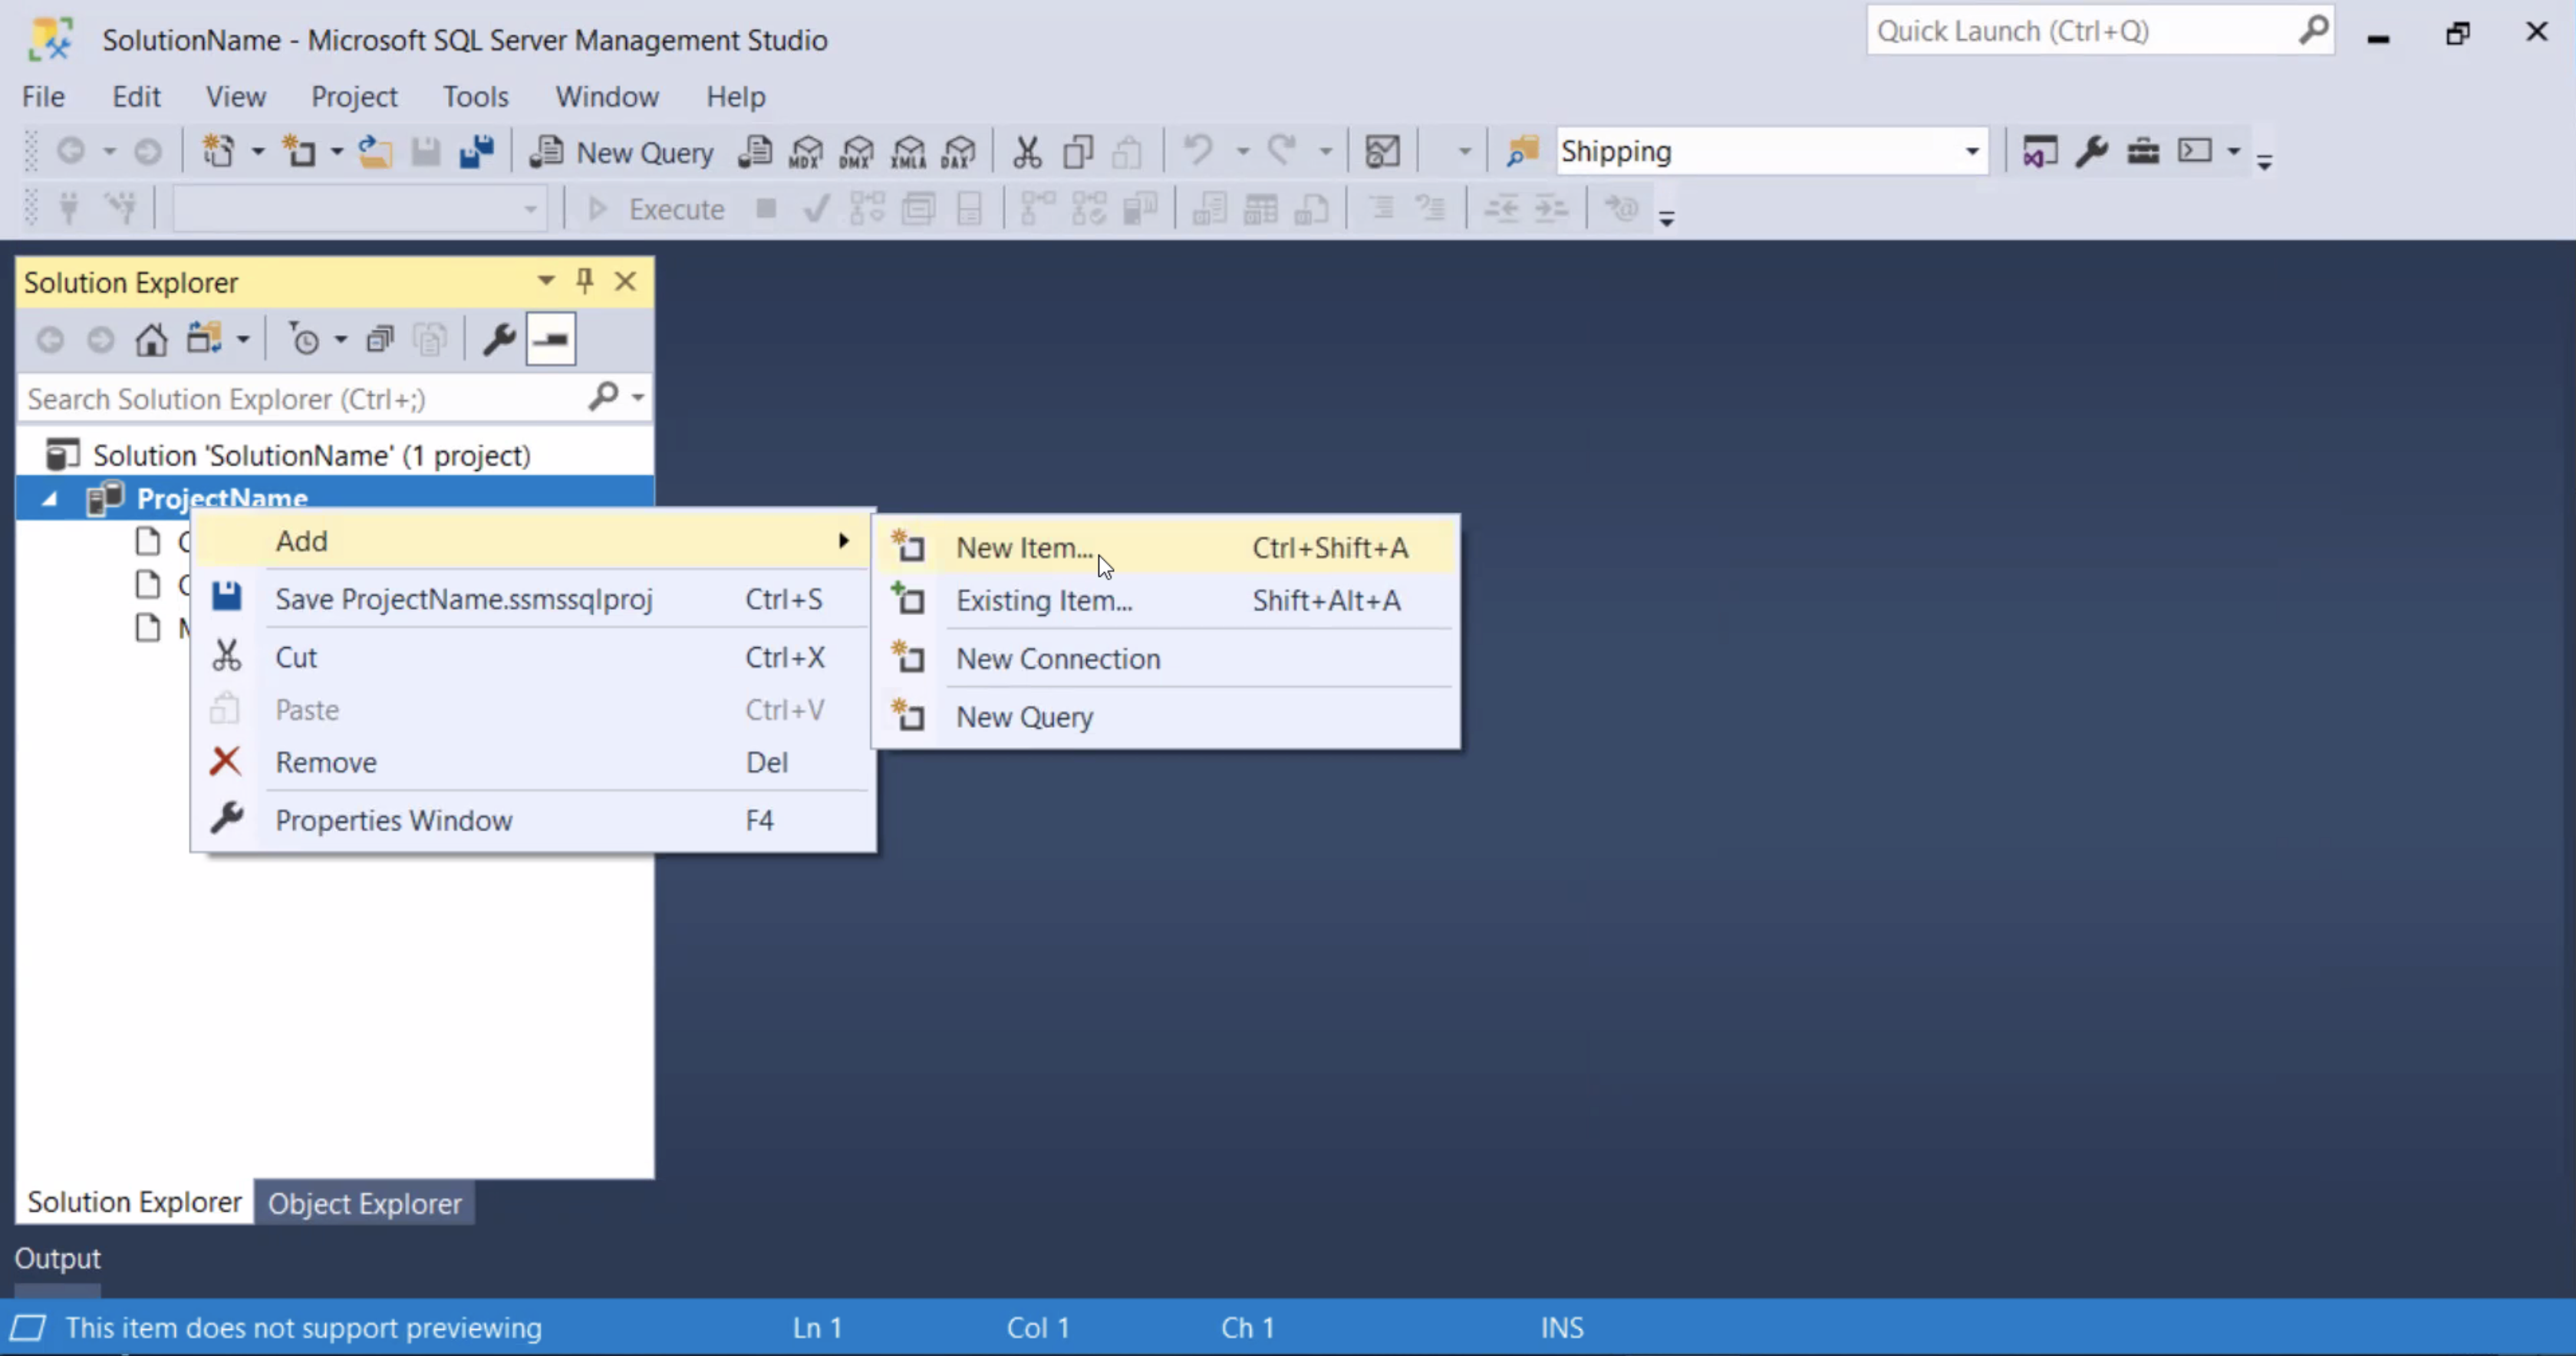
-
Select "SQL Server Query" in the "Add New Item" dialog box
SQL Server Query 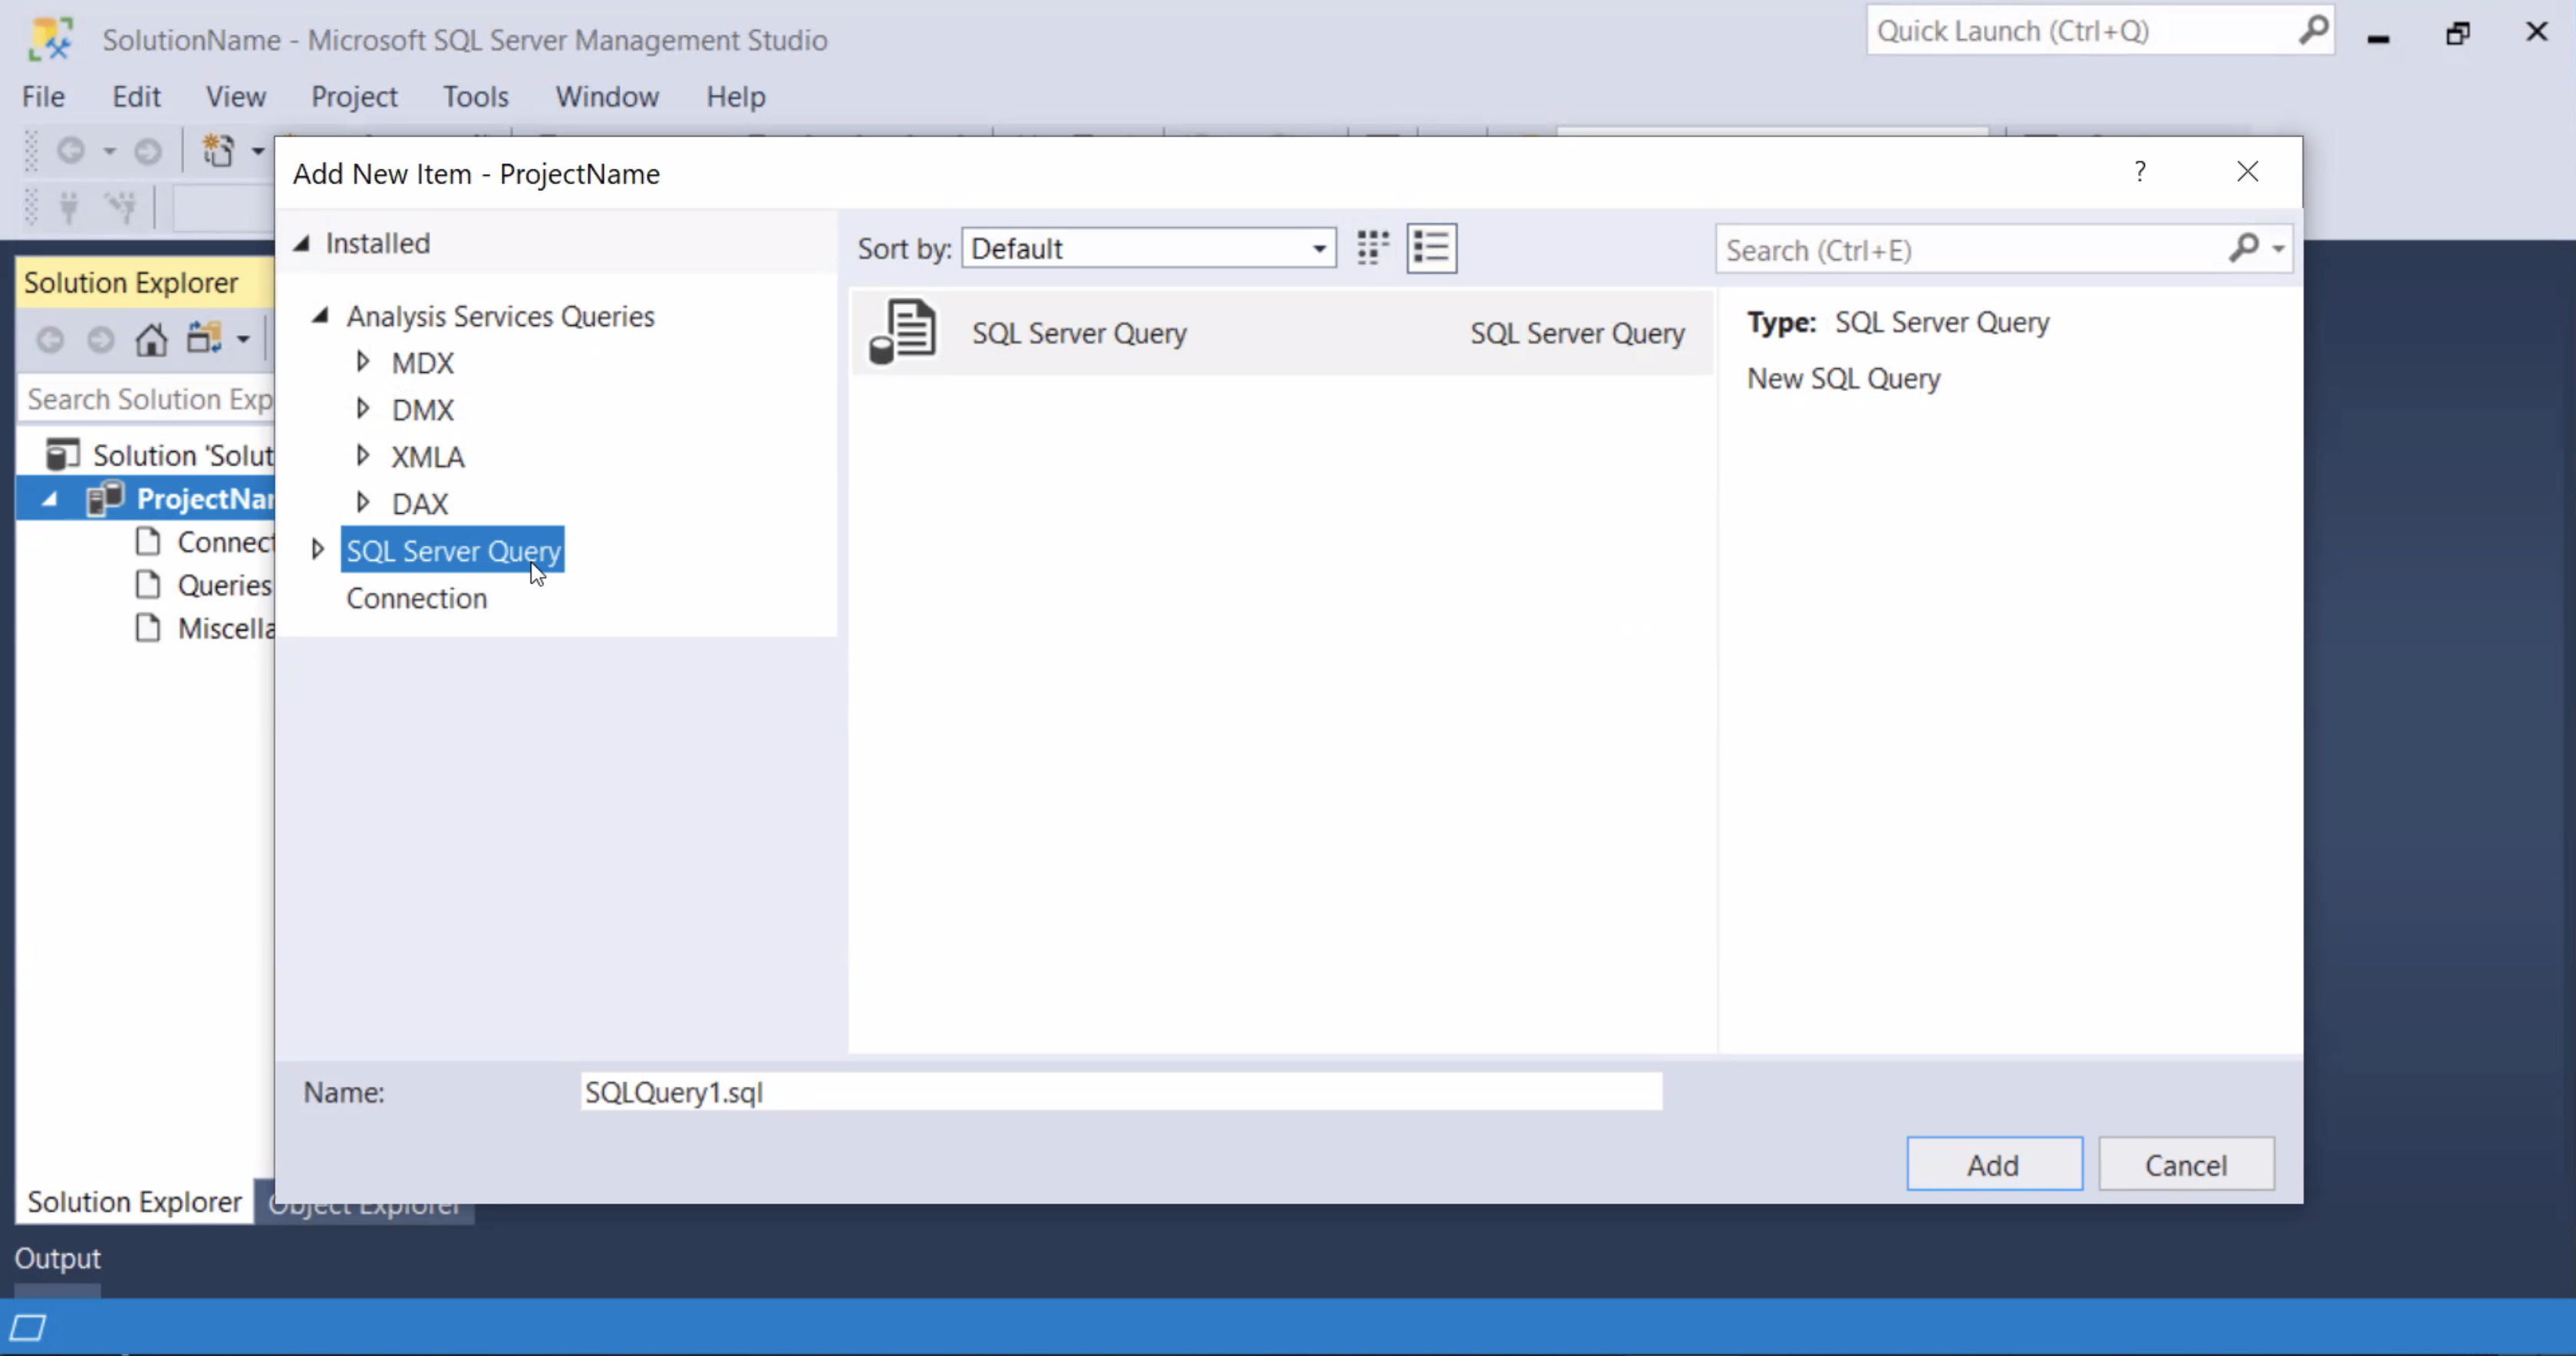
-
Enter the "Name:" and click "Add"
Item Name 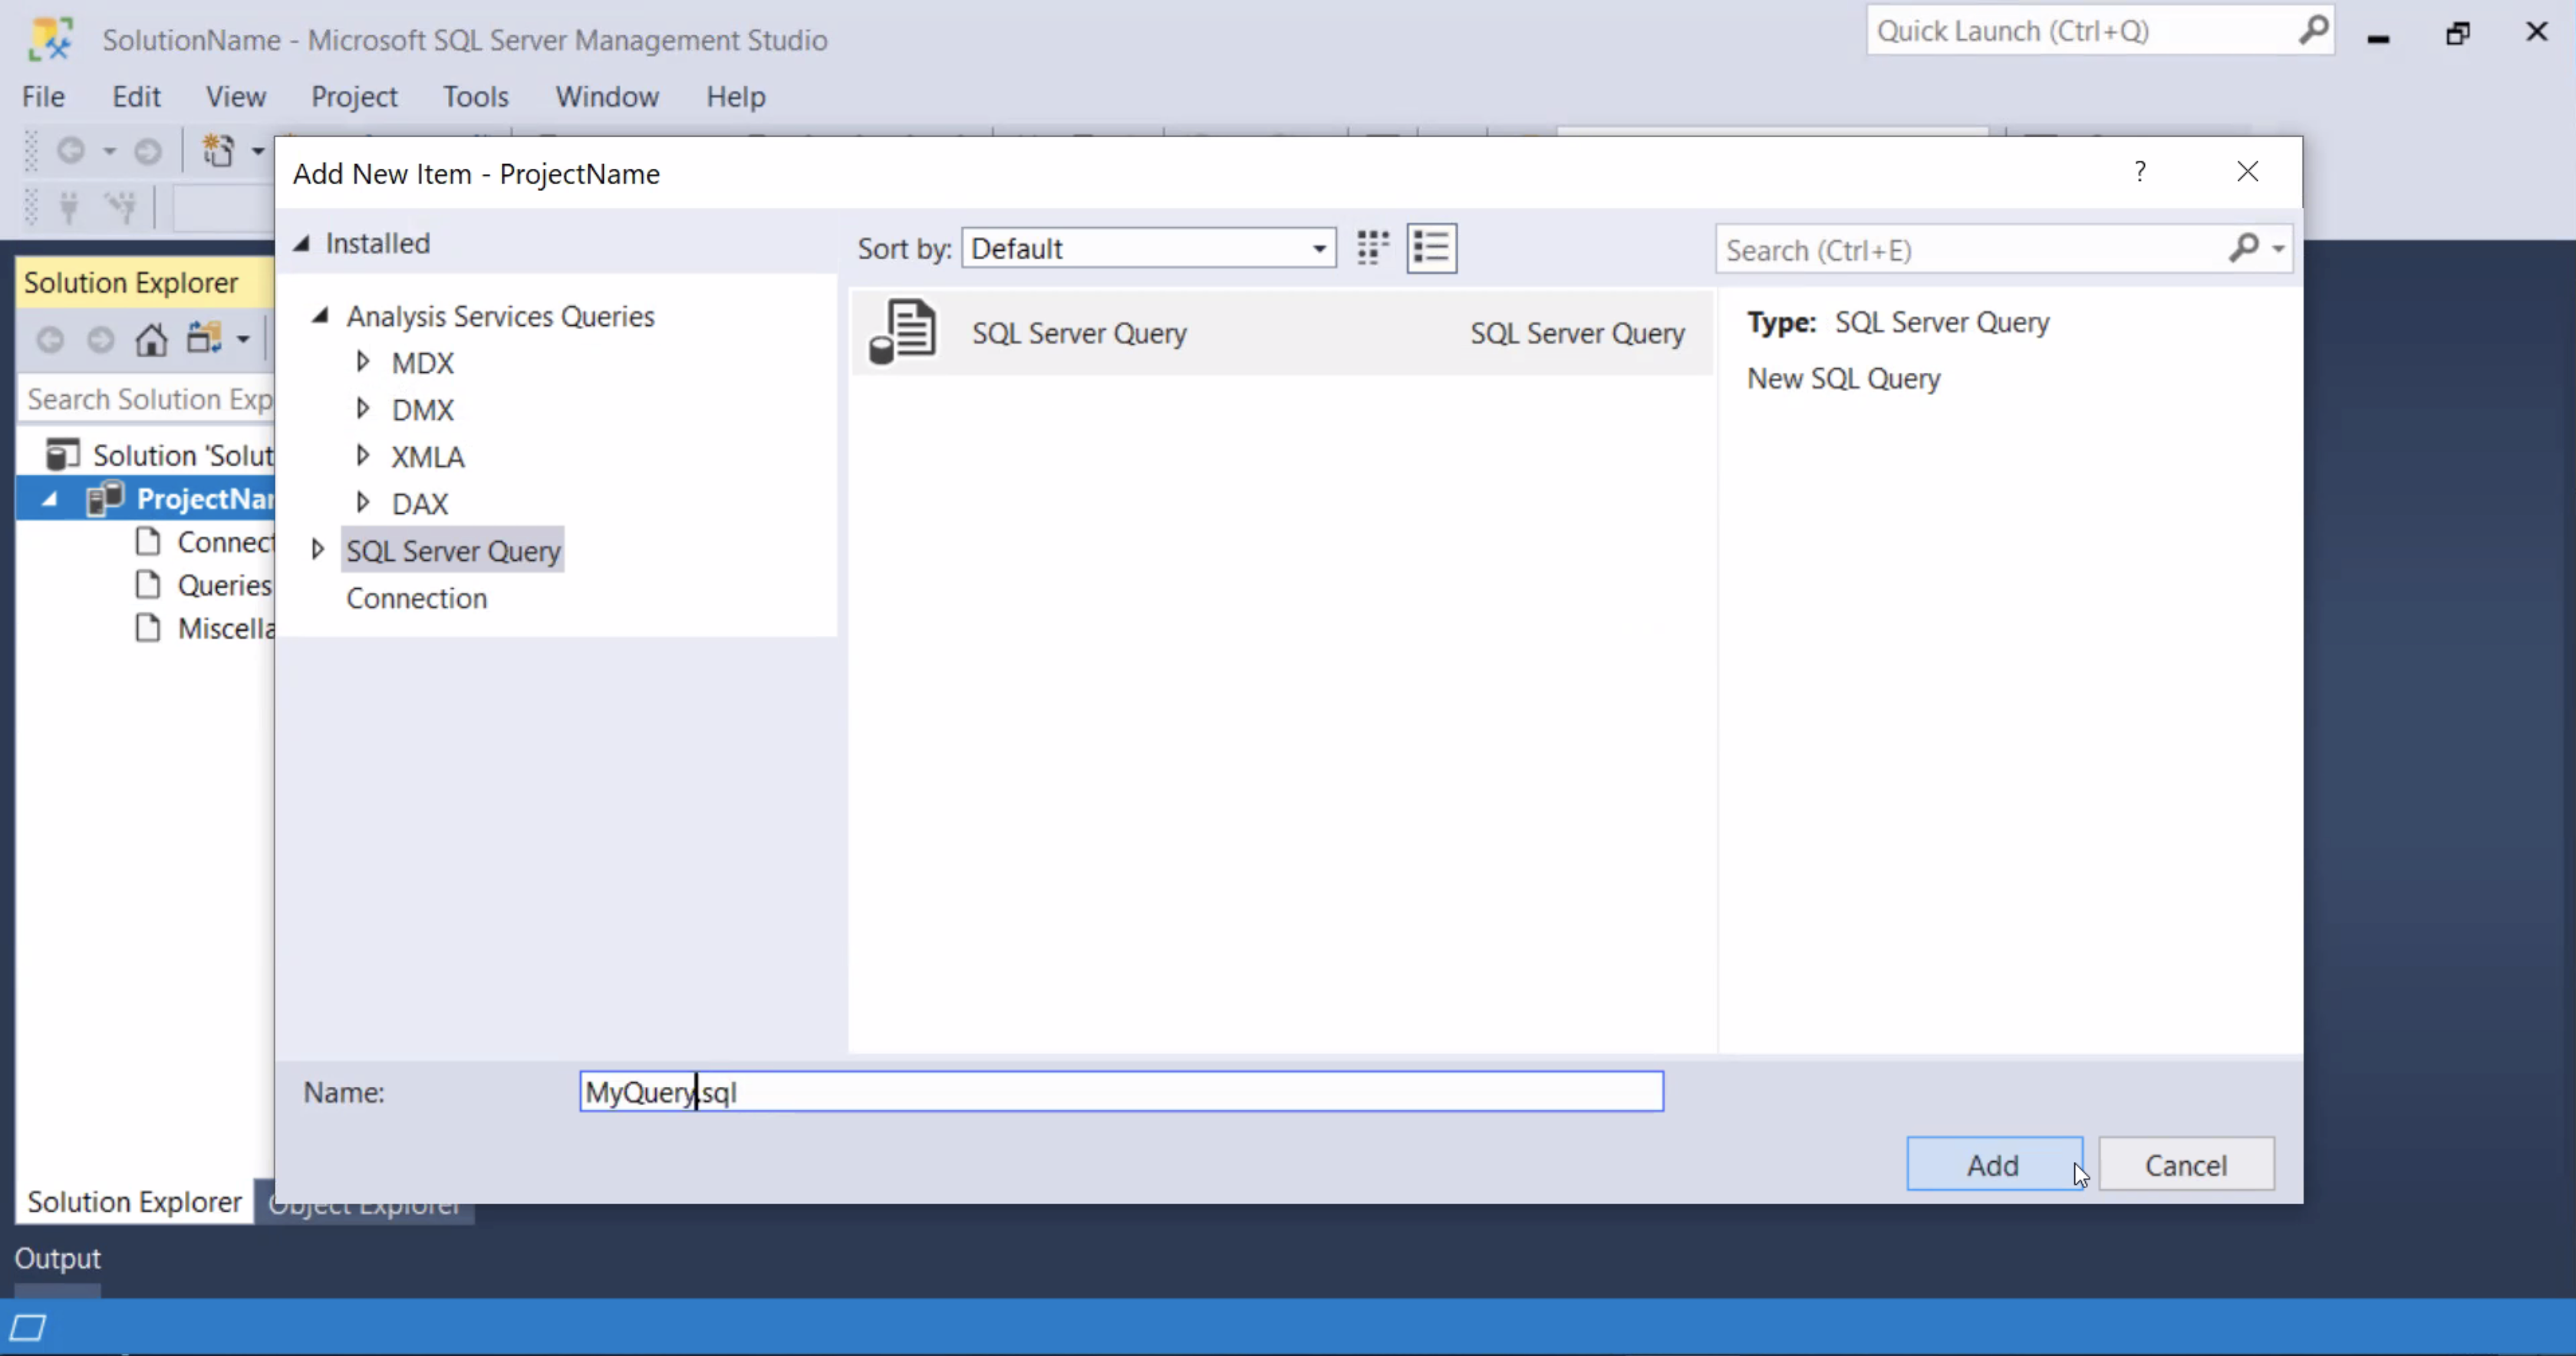
Note: You can use this same technique to add non-SQL files. Just use the appropriate extension in the file name.
-
New SQL files will always be listed under the "Queries" branch in the project tree view. Non-SQL files can be found under "Miscellaneous"
MyQuery.sql 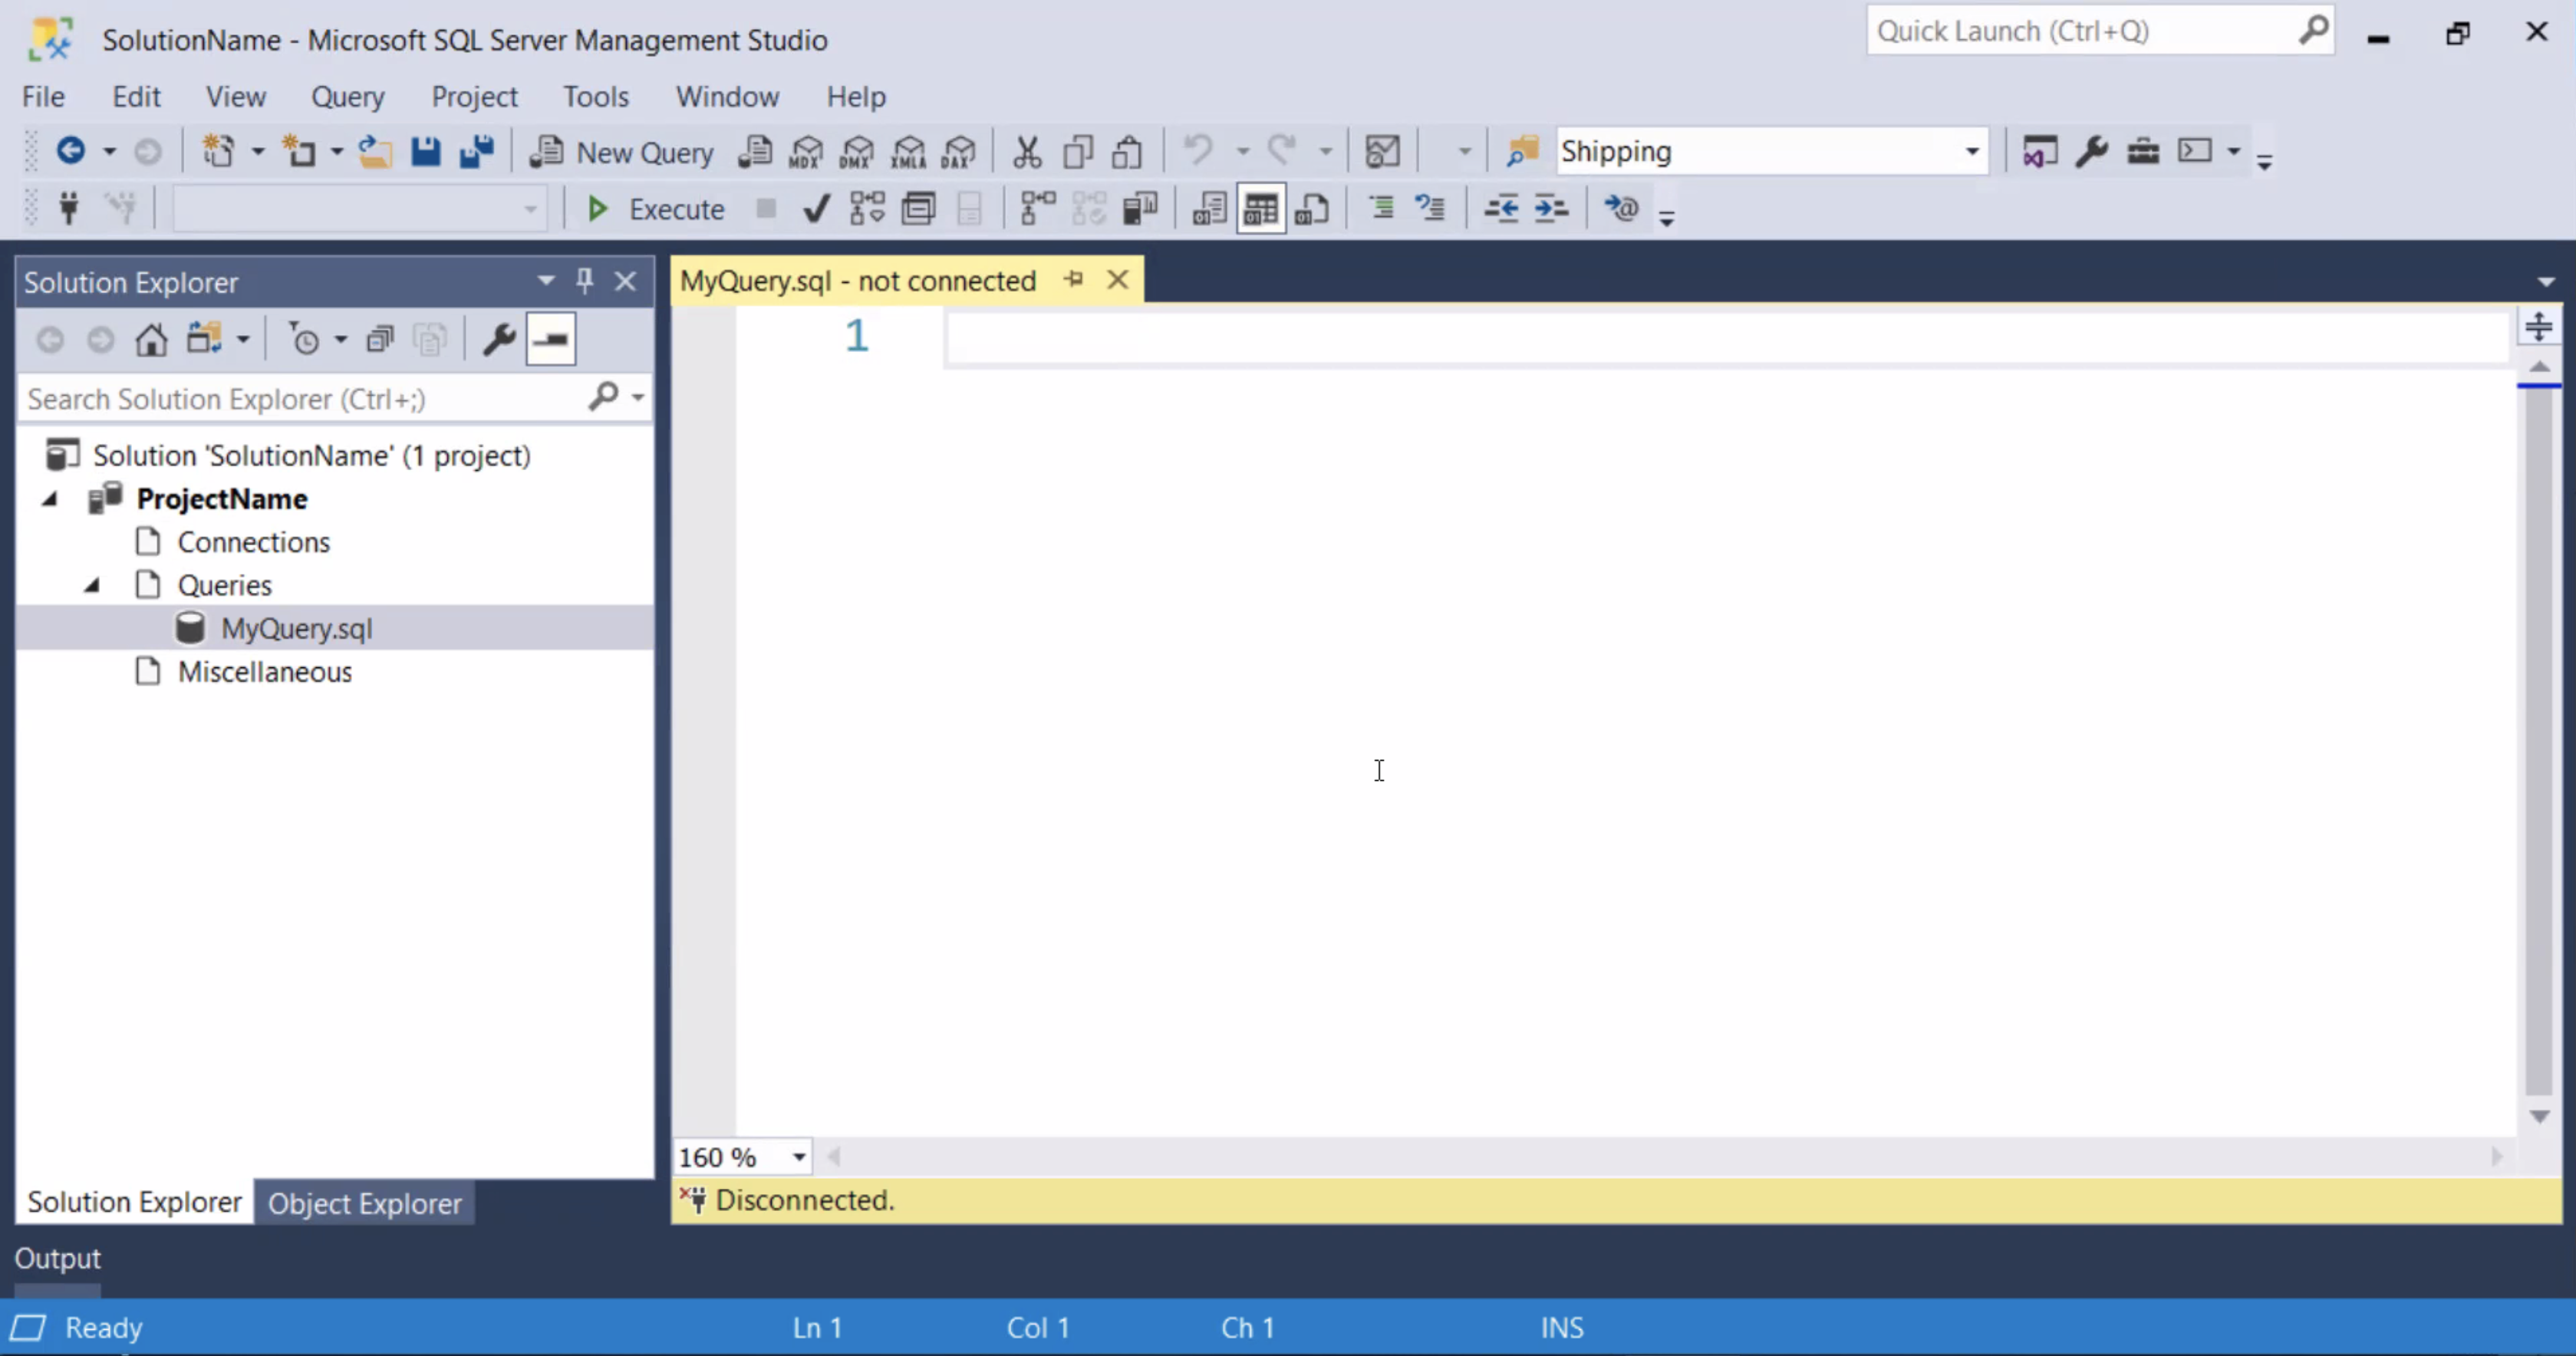
- Right-click on the solution name, and select Add → New Project... from the context menu
Add - New Project 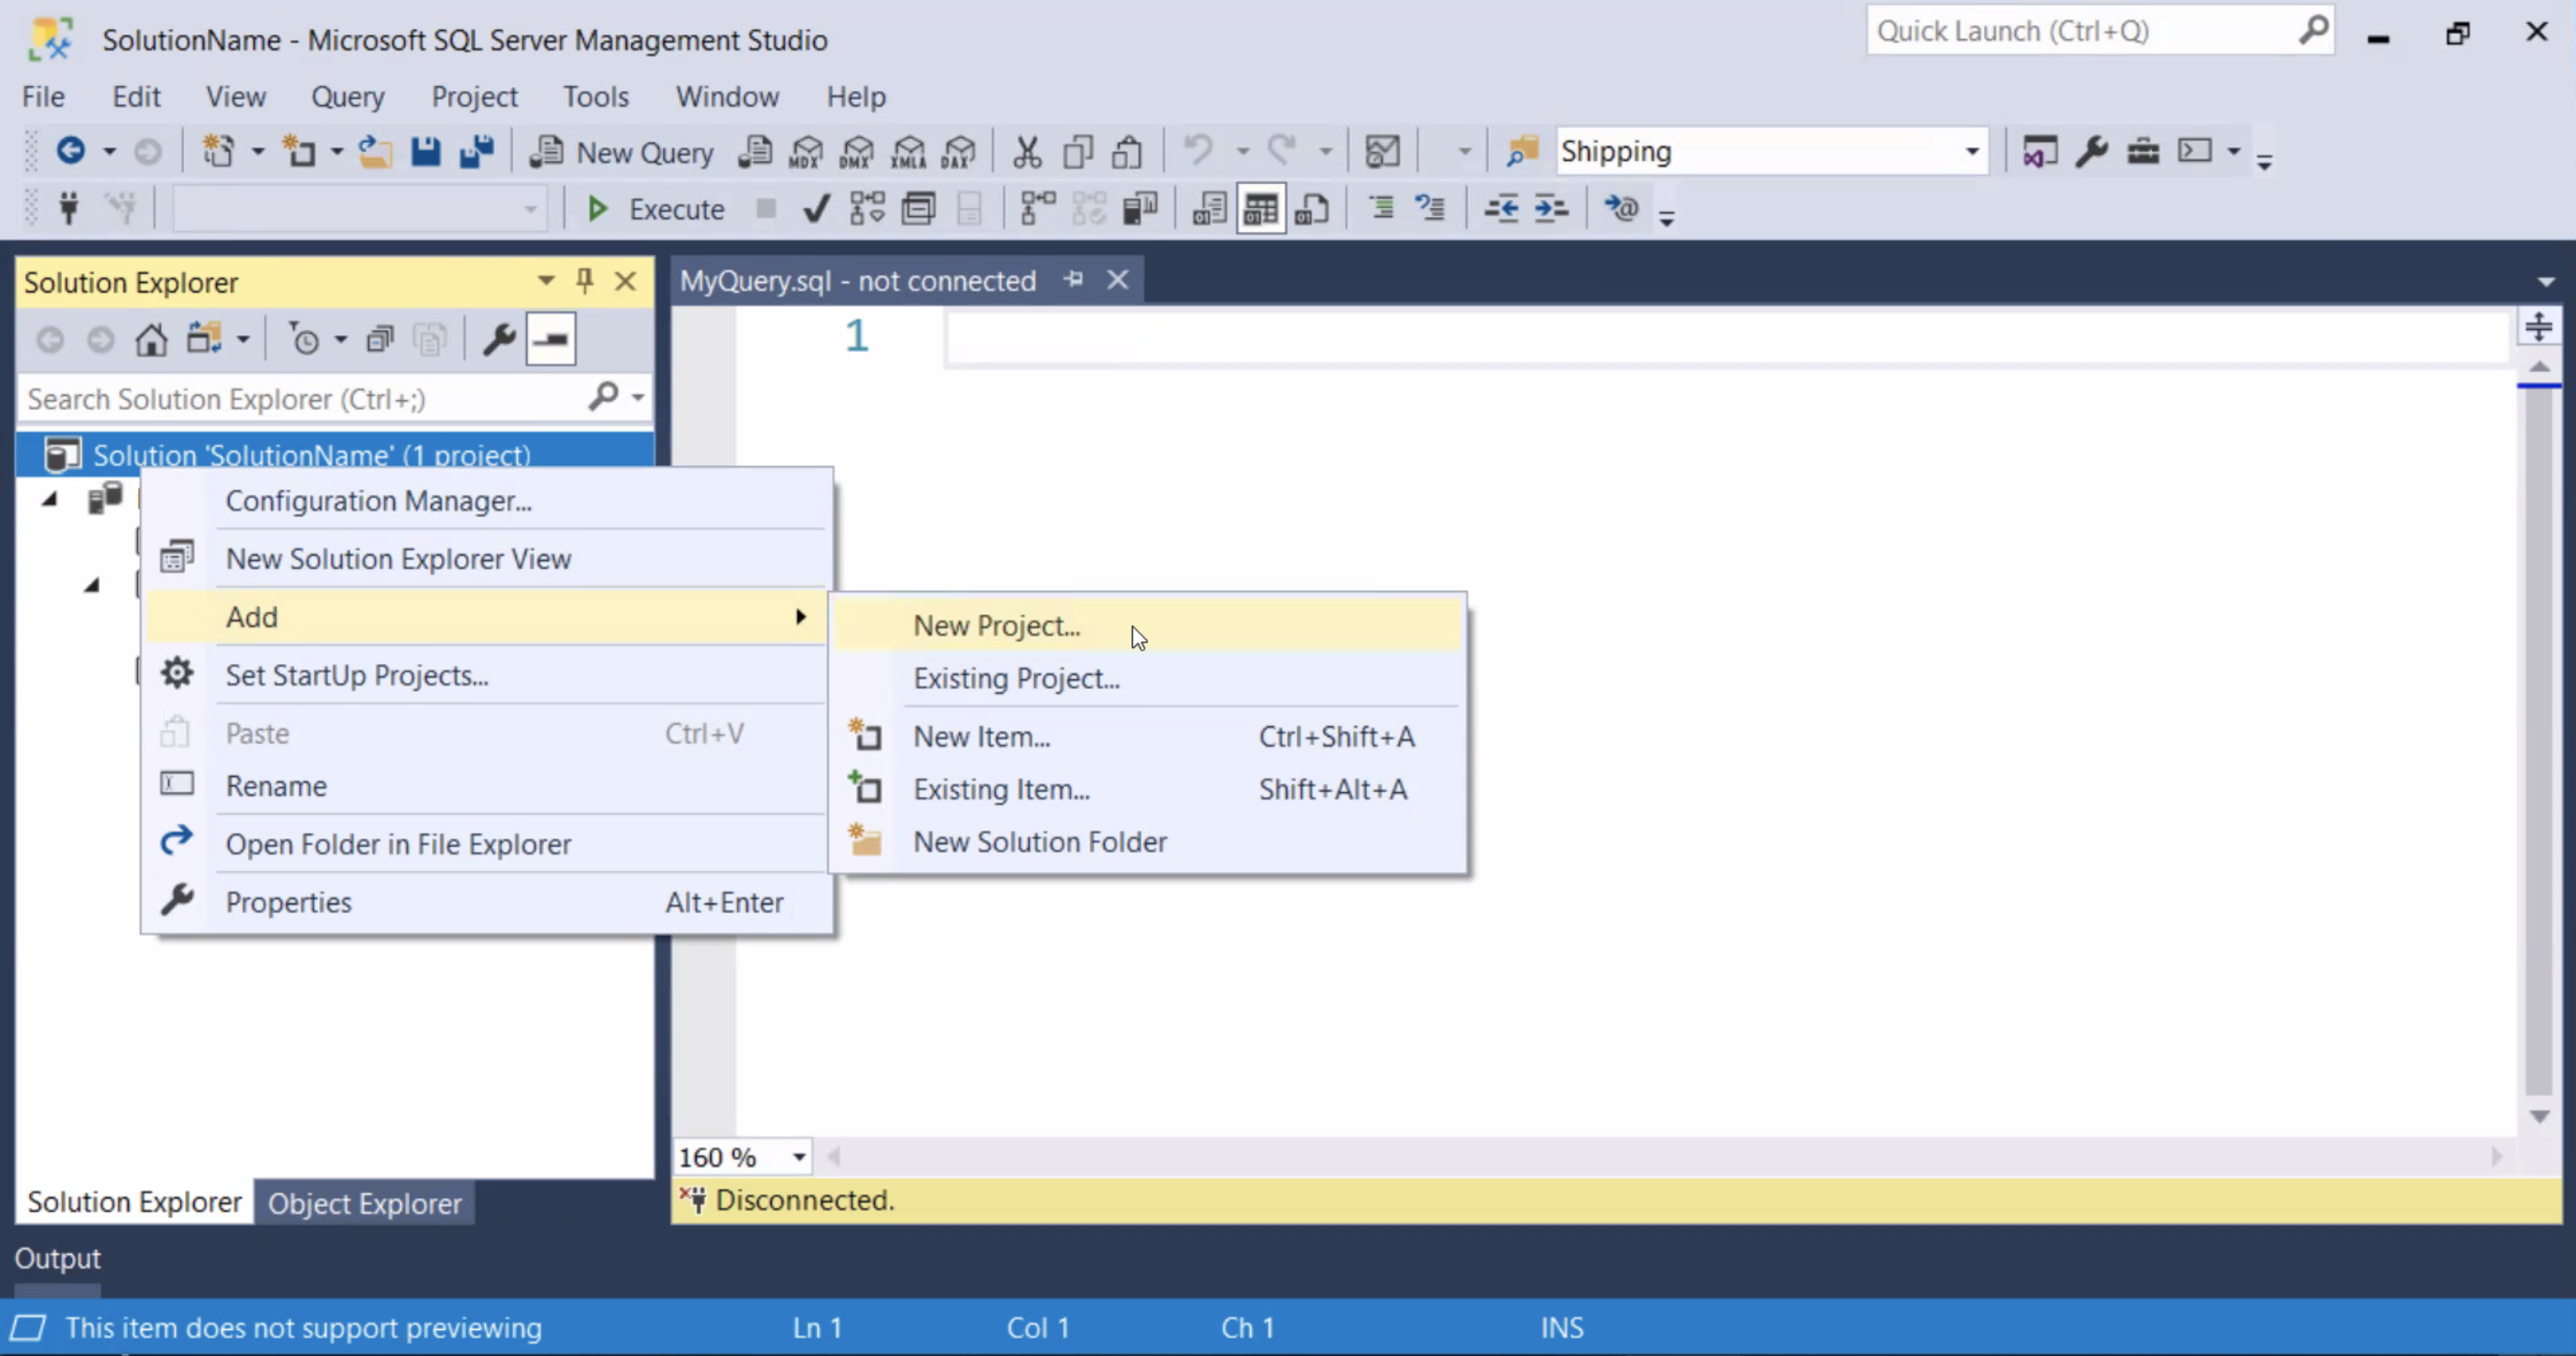
- Enter the "Name:" for the project and click "OK"
New Project Name 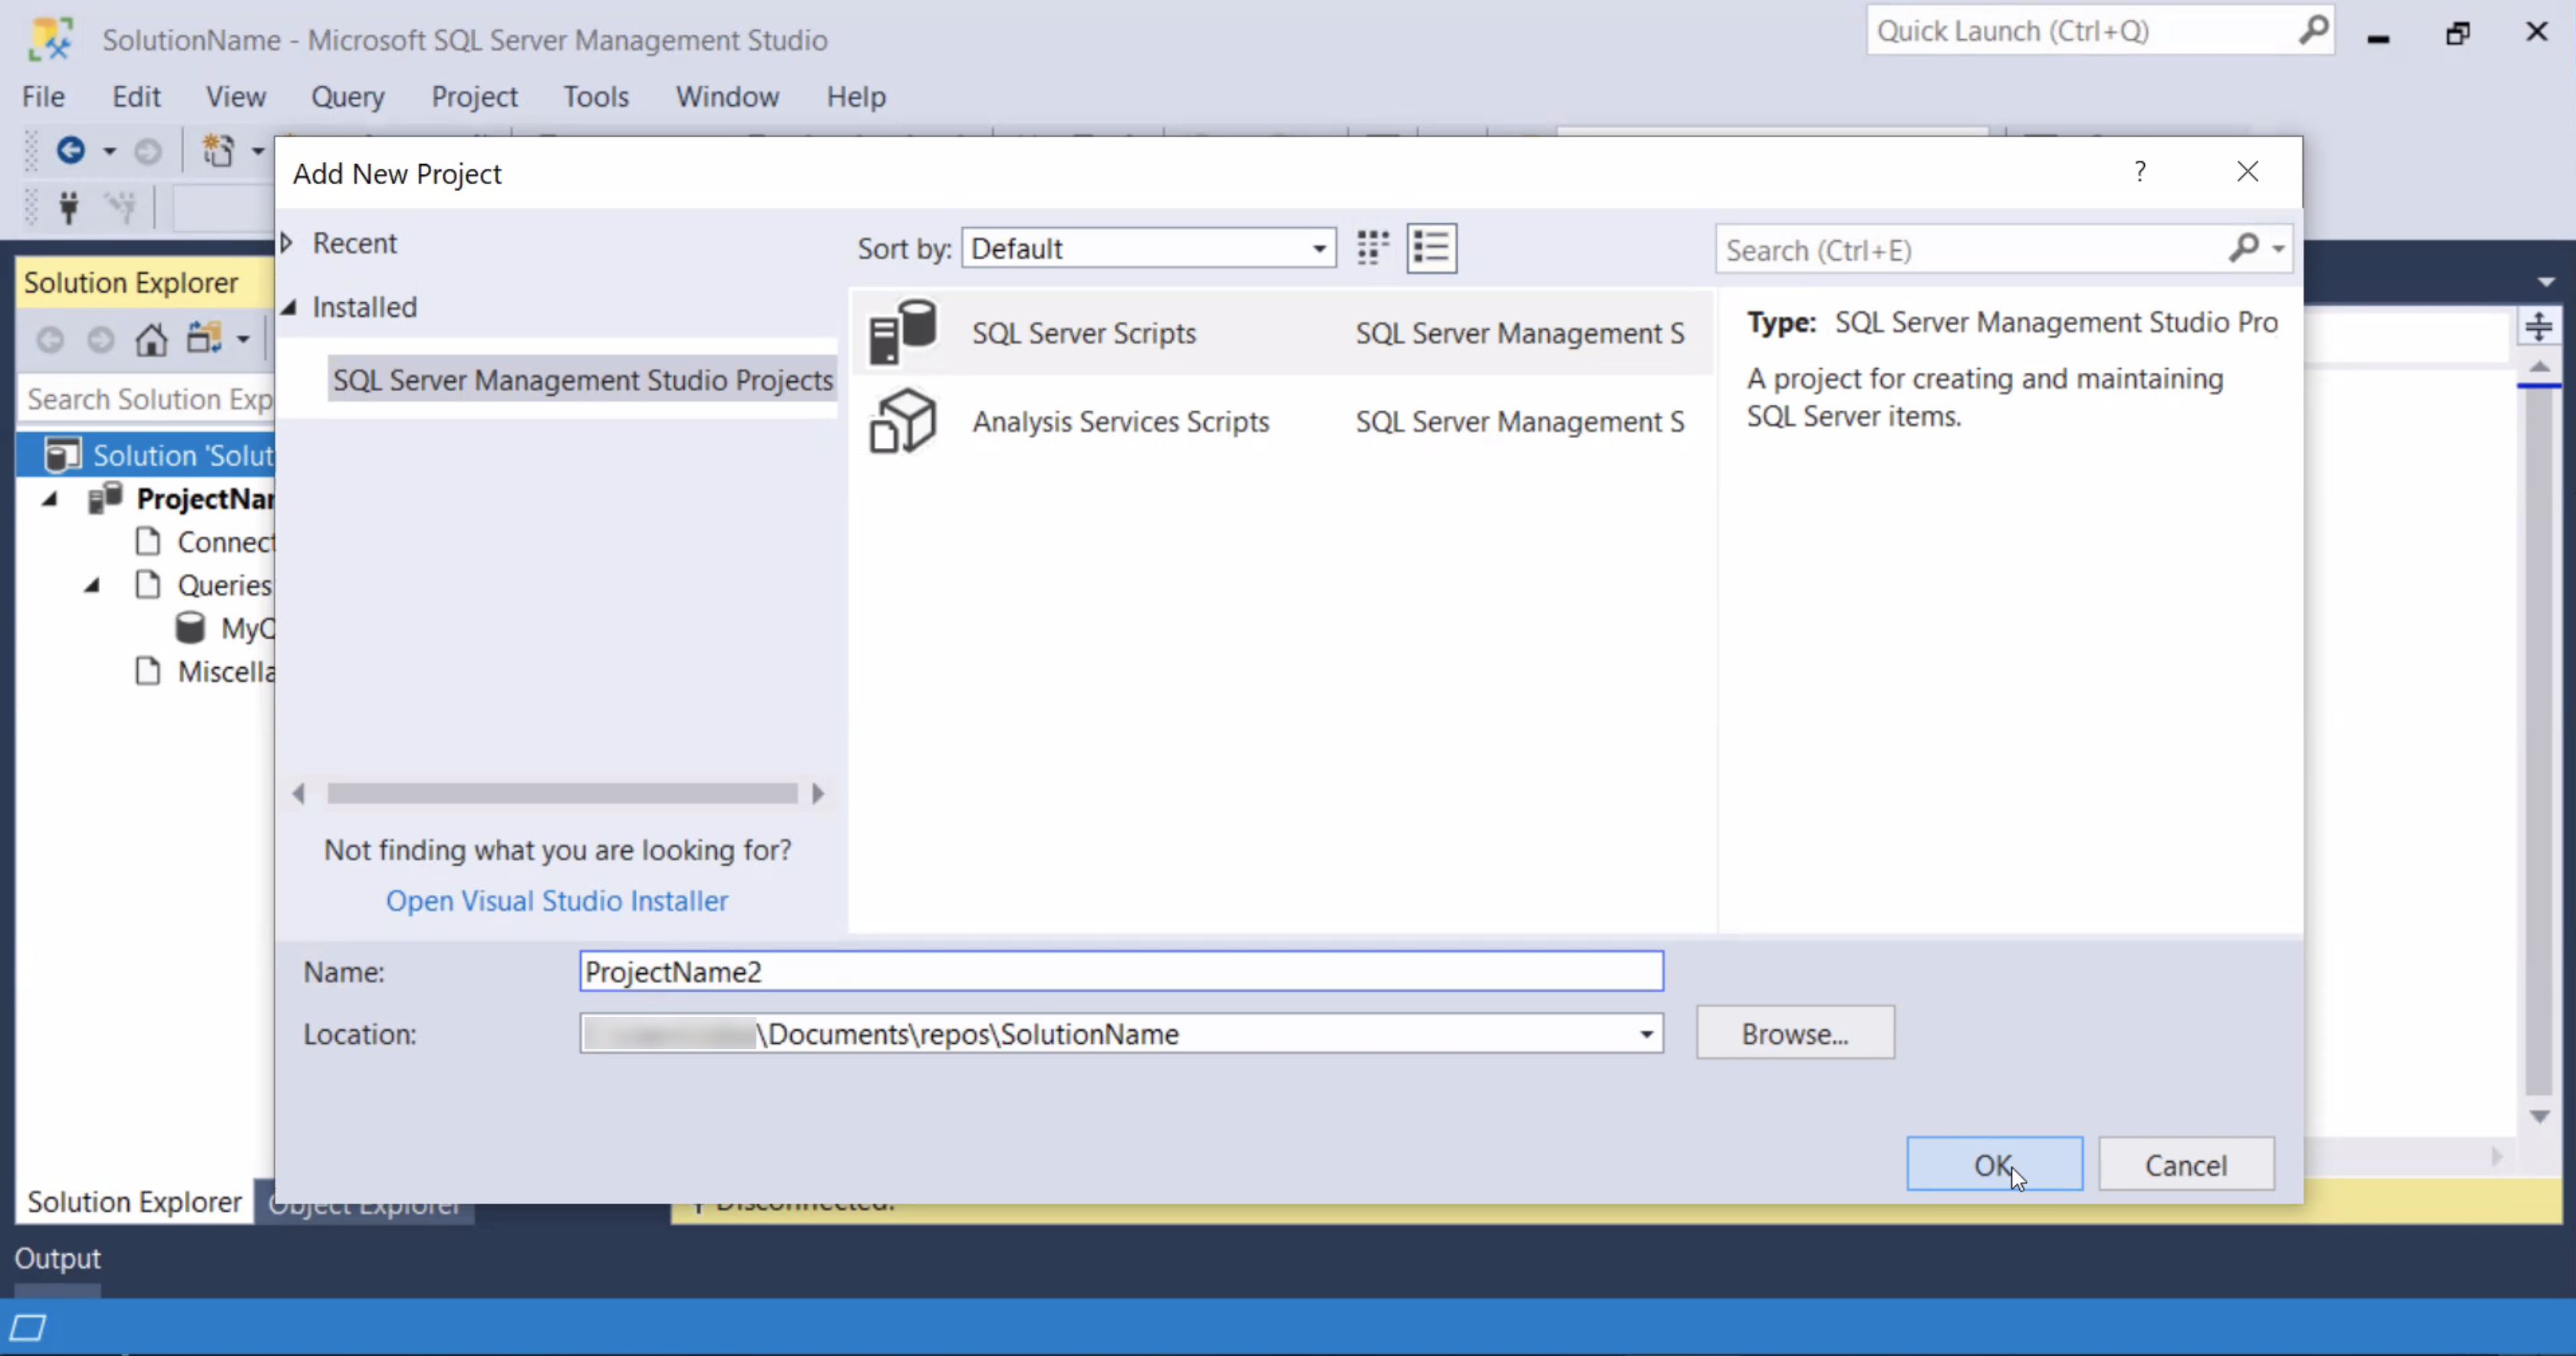
- The project will be listed in alphabetical order in the solution
New Project Created 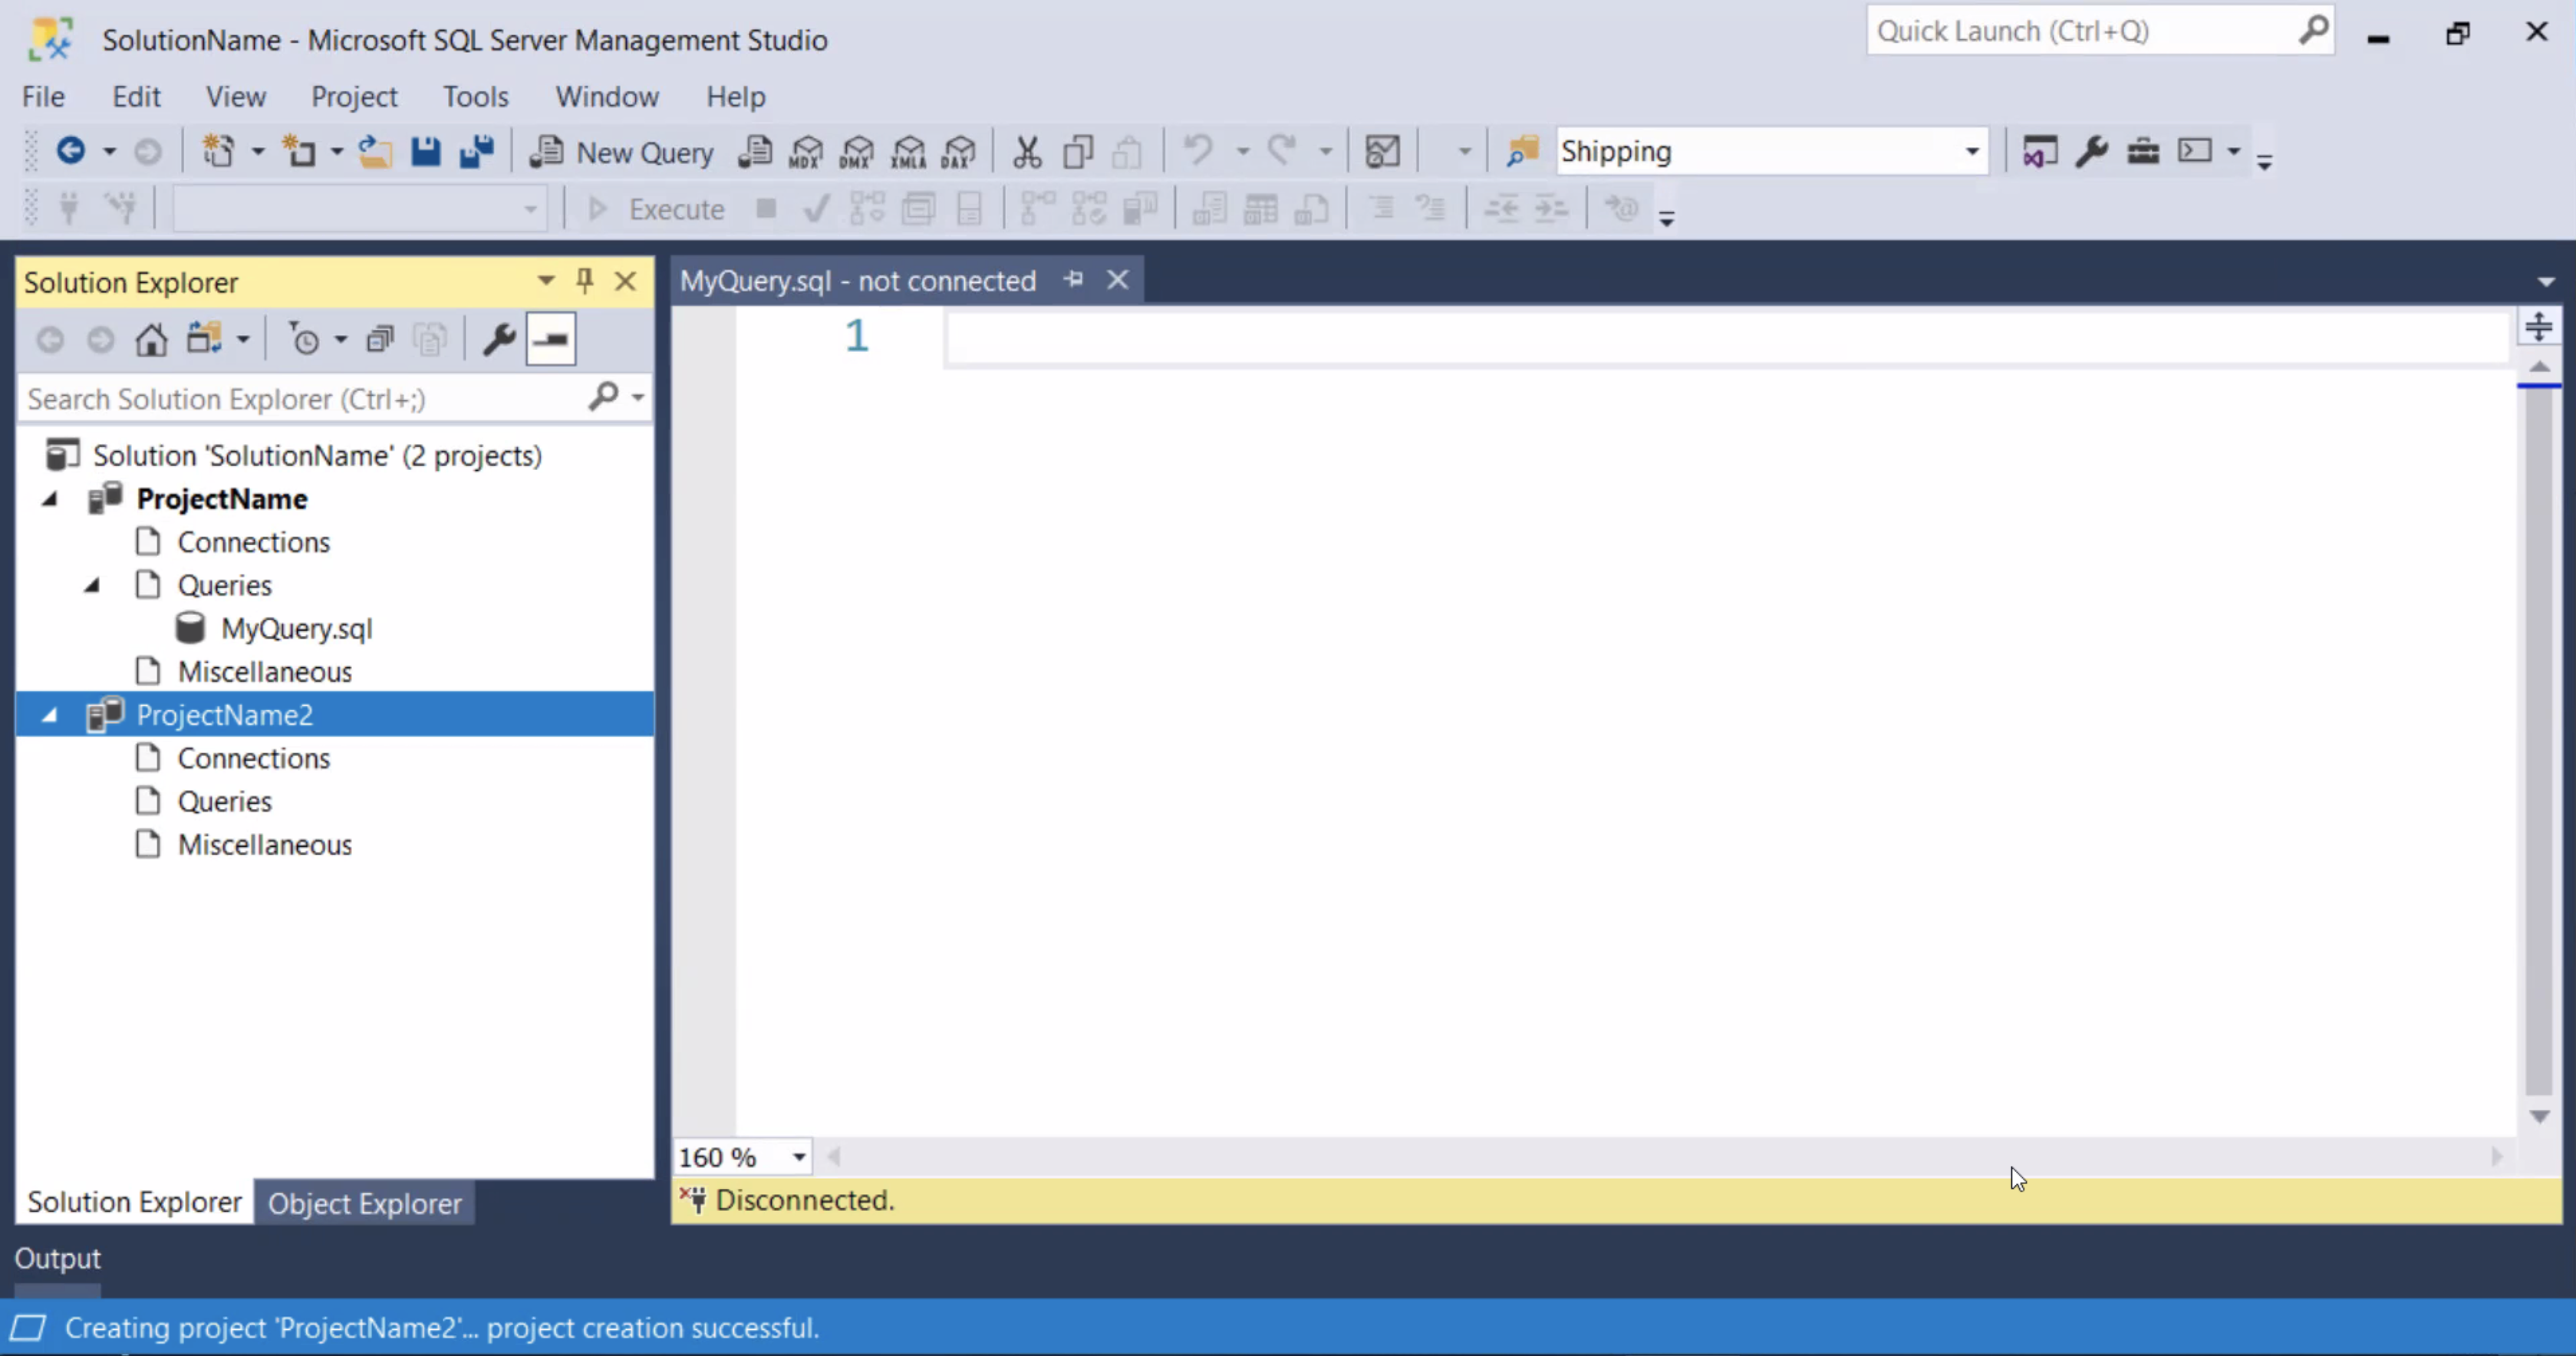
- Right-click on the project name, and select Add → Existing Item... from the context menu
Add - Existing Item 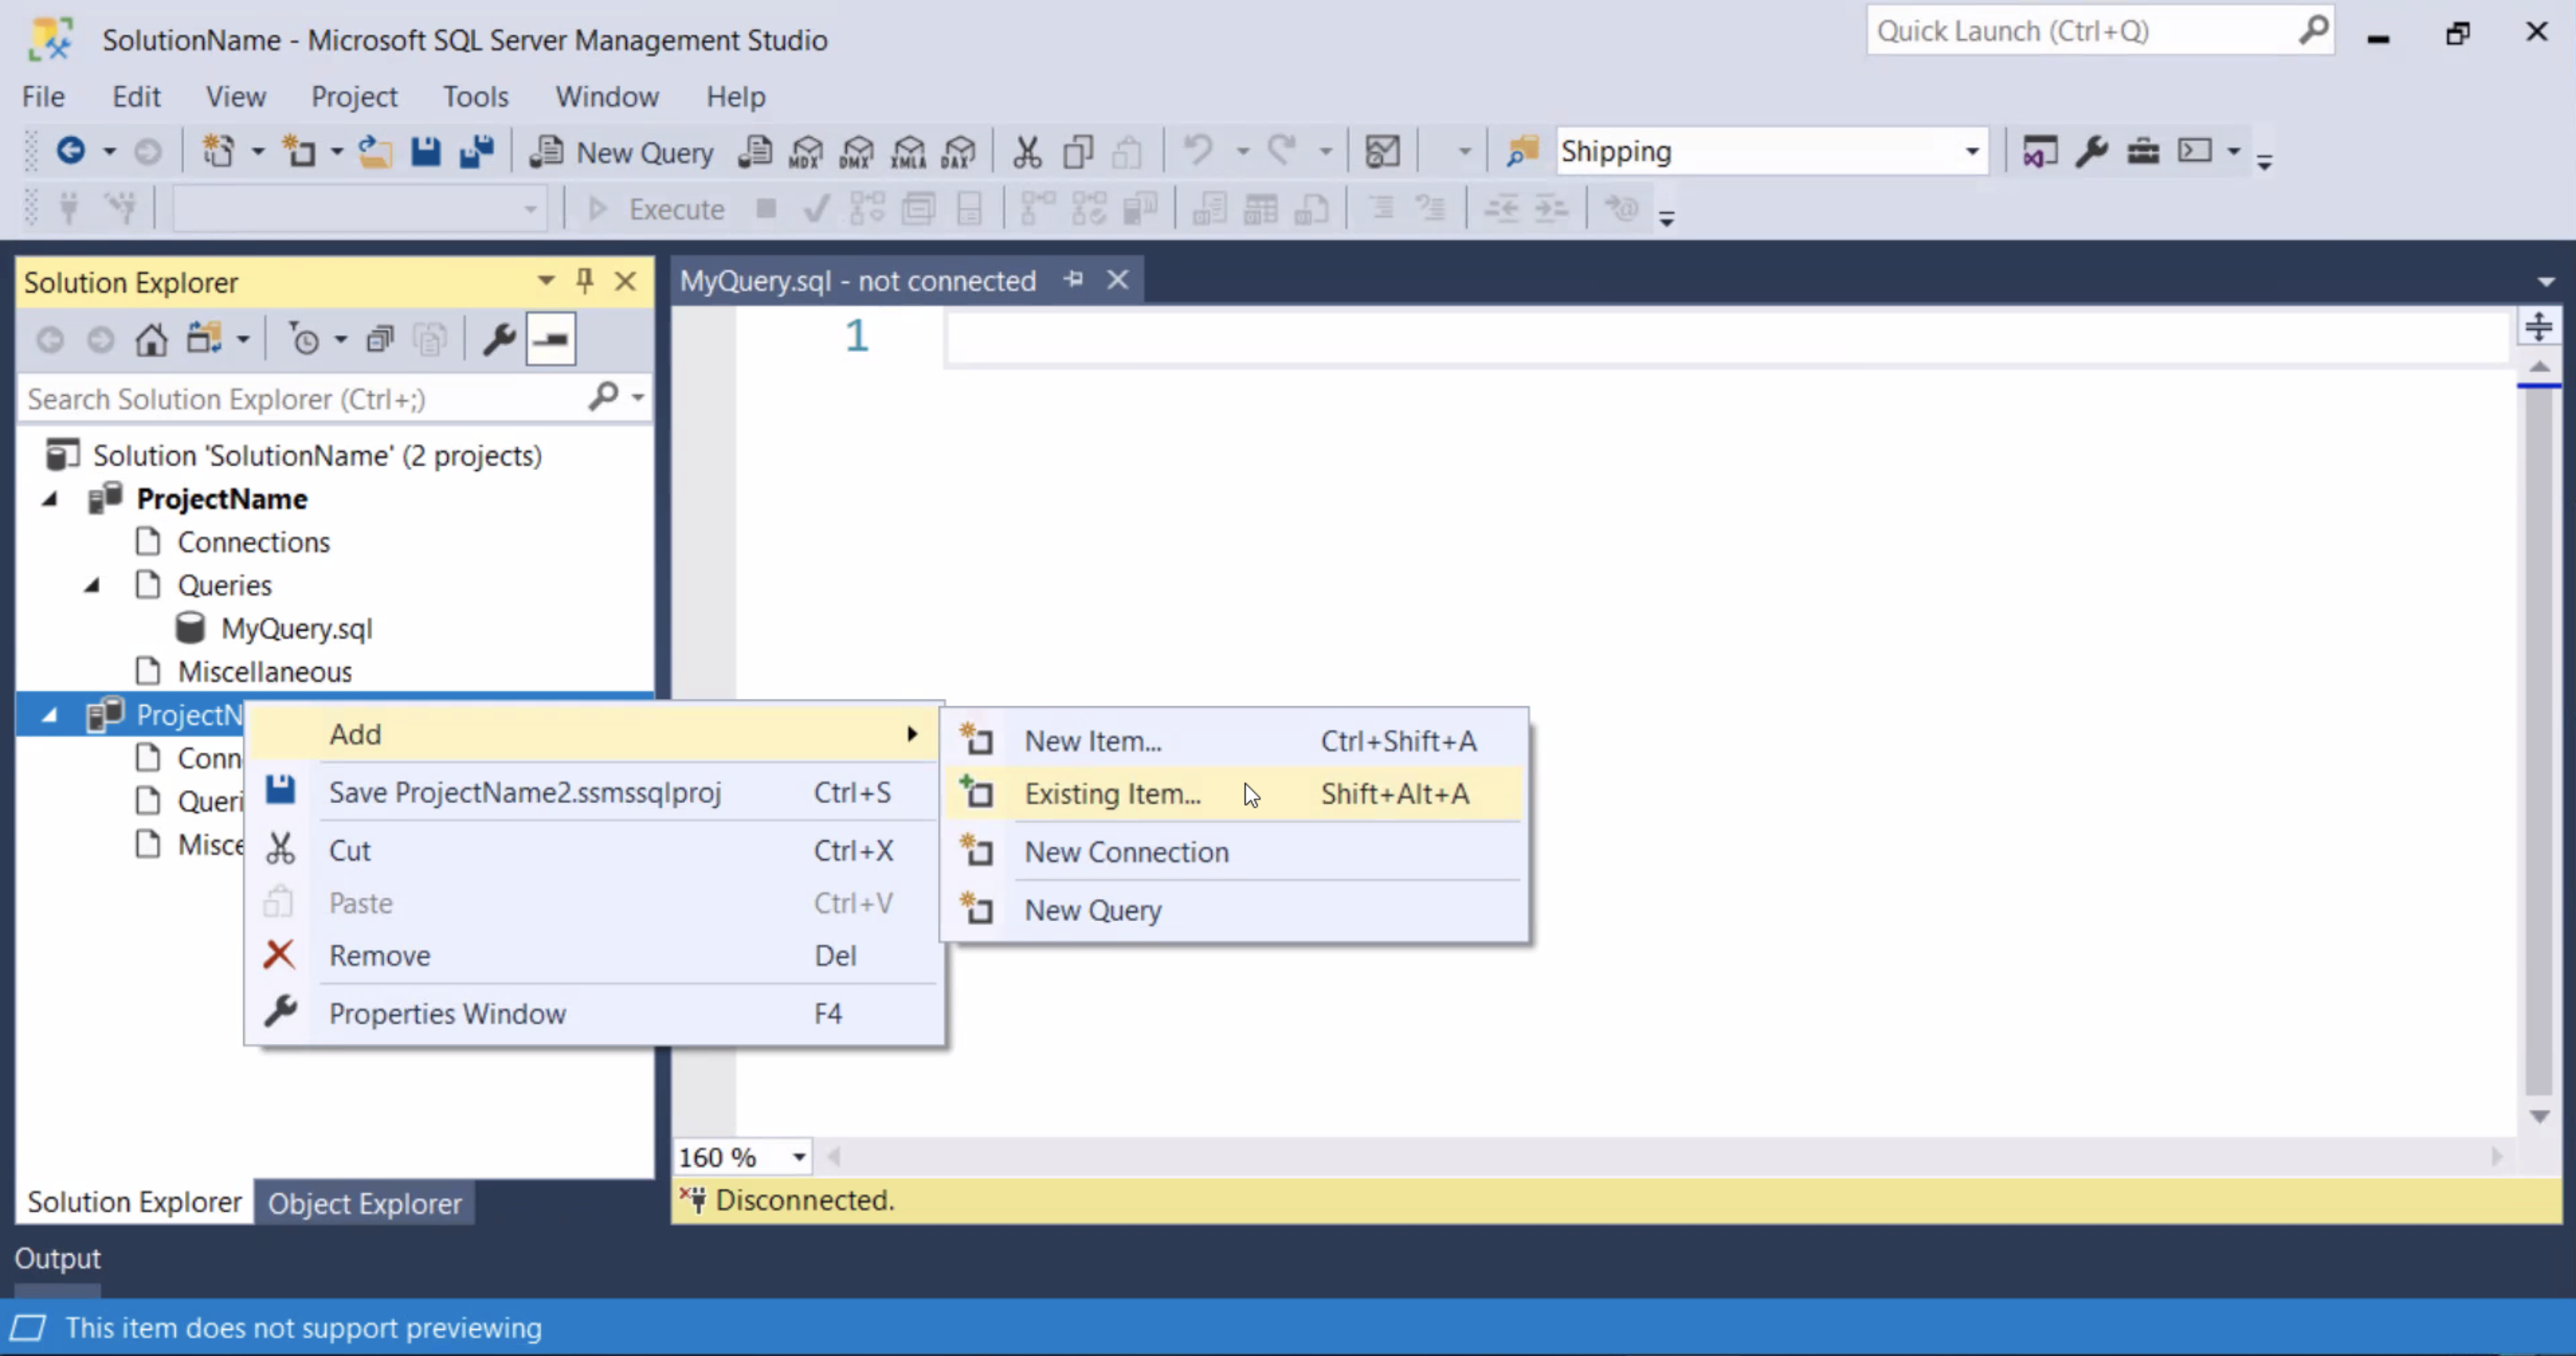
- In the "Add Existing Item" dialog, select the file you want to add to the project and click "Add"
Selecting a File - Anywhere 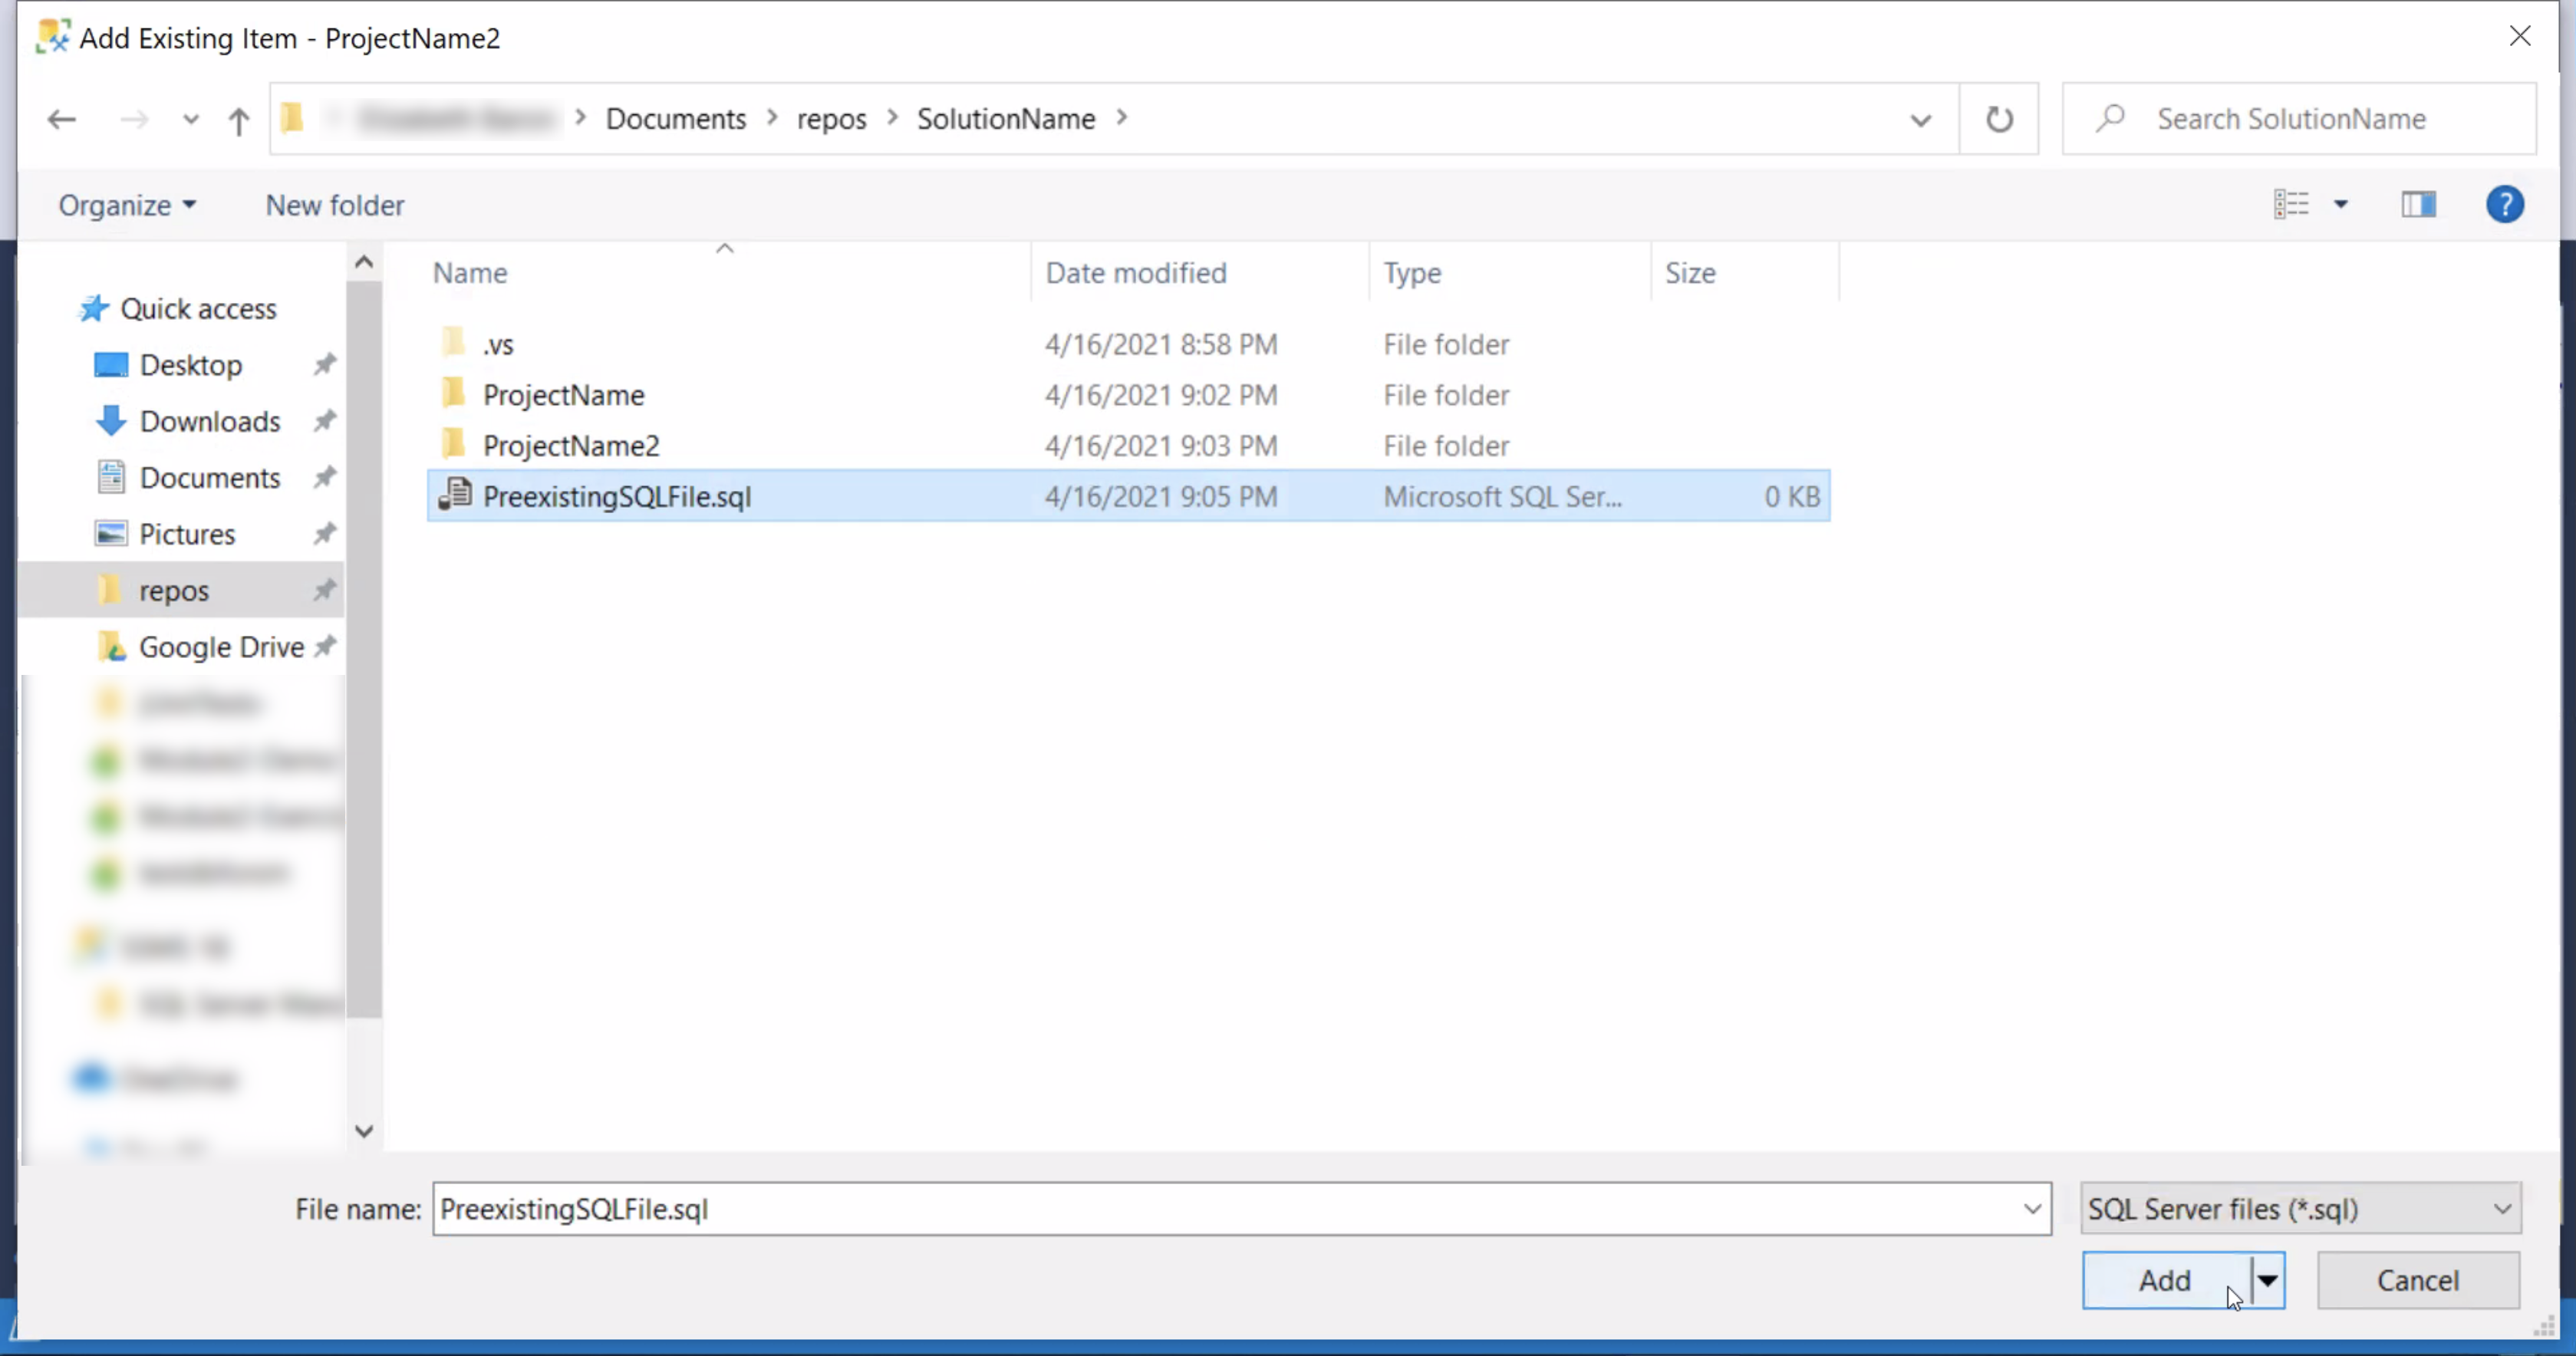
- Note: If the file you selected is not in the project directory, SSMS will create a copy for you in the project directory.
Copied and Added File 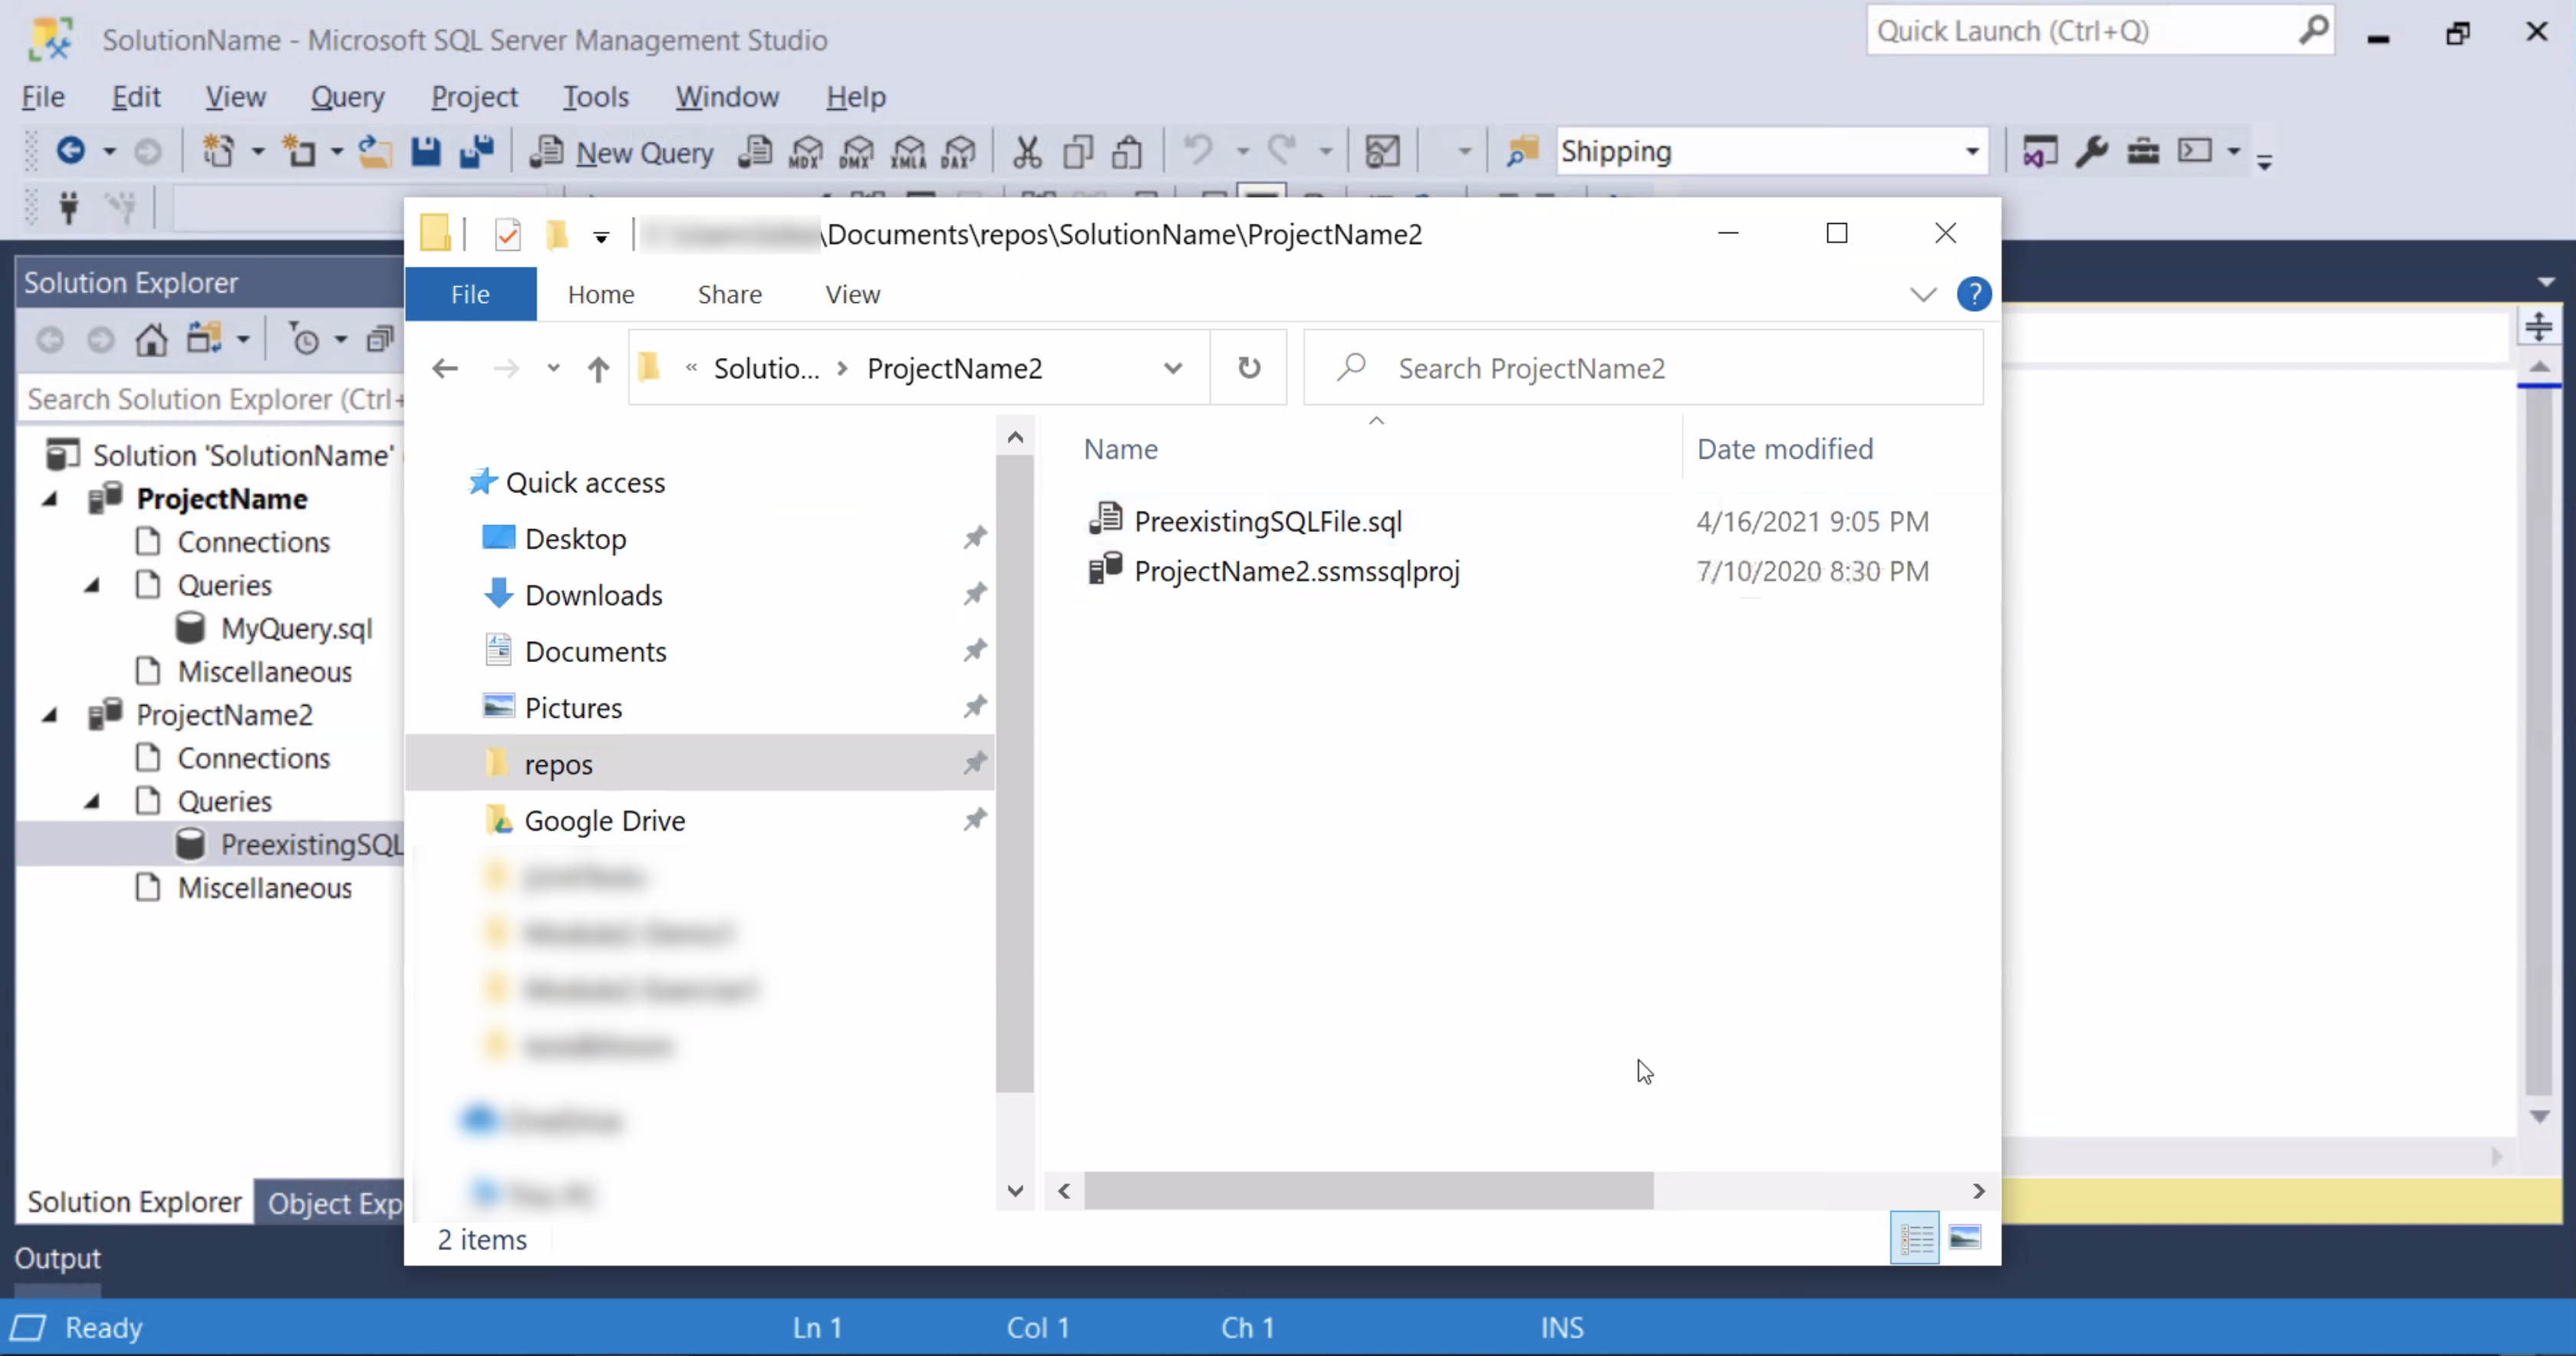
SSMS creates a directory for each project in the solution and adds a .ssmssqlproj file in it. There is also a .ssmssln file that contains the main information for that solution. Other files in those directories might be part of a project in the solution. However, files are not automatically added, so you might see files that are not part of the solution at all (for example ~\Documents\repos\SolutionName\PreexistingSQLFile.sql in the image below).
-
SSMS Solution Folder Structure 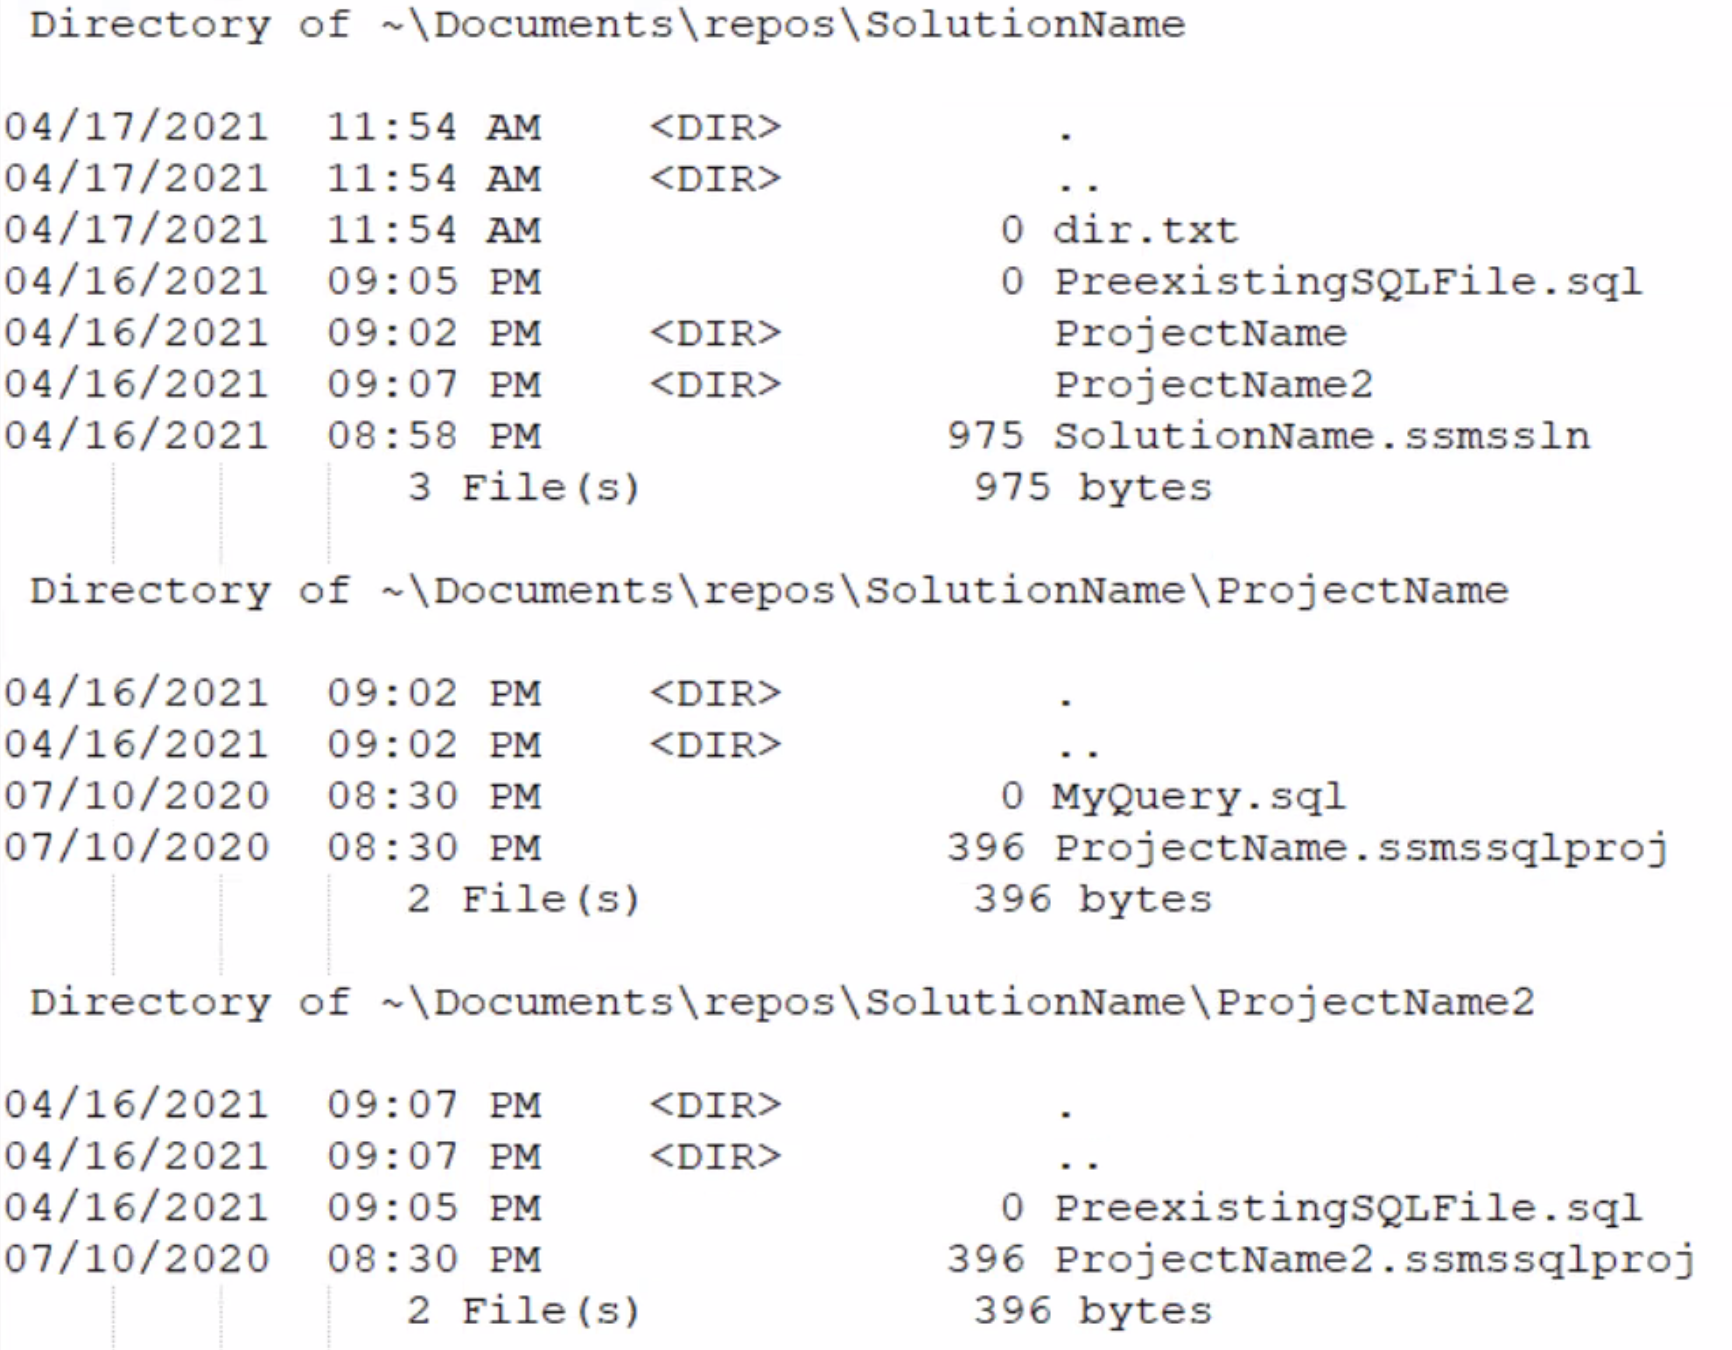
We recommend the following for your database projects:
-
Create one project for your database application code and another project for the tests. However in more complex scenarios you can create as many projects as you like for each of the two areas, code and tests.
-
Delete your connection information before checking in if you are working in a team. This is not a security issue, but makes working on different SQL Server instances easier.